> ## Documentation Index
> Fetch the complete documentation index at: https://honcho.dev/docs/llms.txt
> Use this file to discover all available pages before exploring further.
# The Honcho Dashboard
> Build stateful agents without worrying about infrastructure
Start using the platform to manage Honcho instances for your workspace or app.
The quickest way to begin using Honcho in production is with the
[Honcho Cloud Service](https://app.honcho.dev). Sign up, generate an API key,
and start building with Honcho.
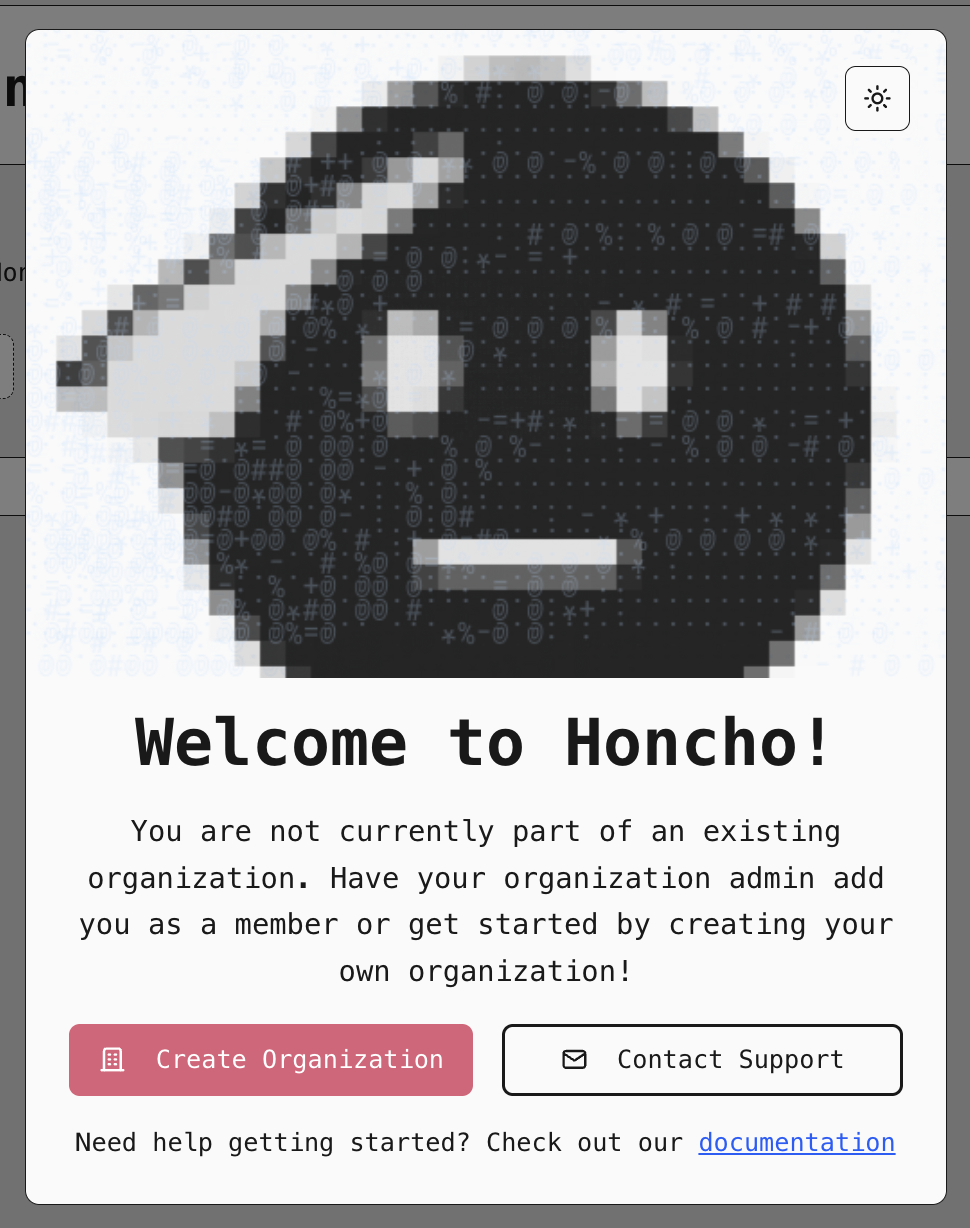
## 1. Go to [app.honcho.dev](https://app.honcho.dev)
Create an account to start using Honcho. If a teammate already uses Honcho, ask
them to invite you to their organization. Otherwise, you'll see a banner
prompting you to create a new one.
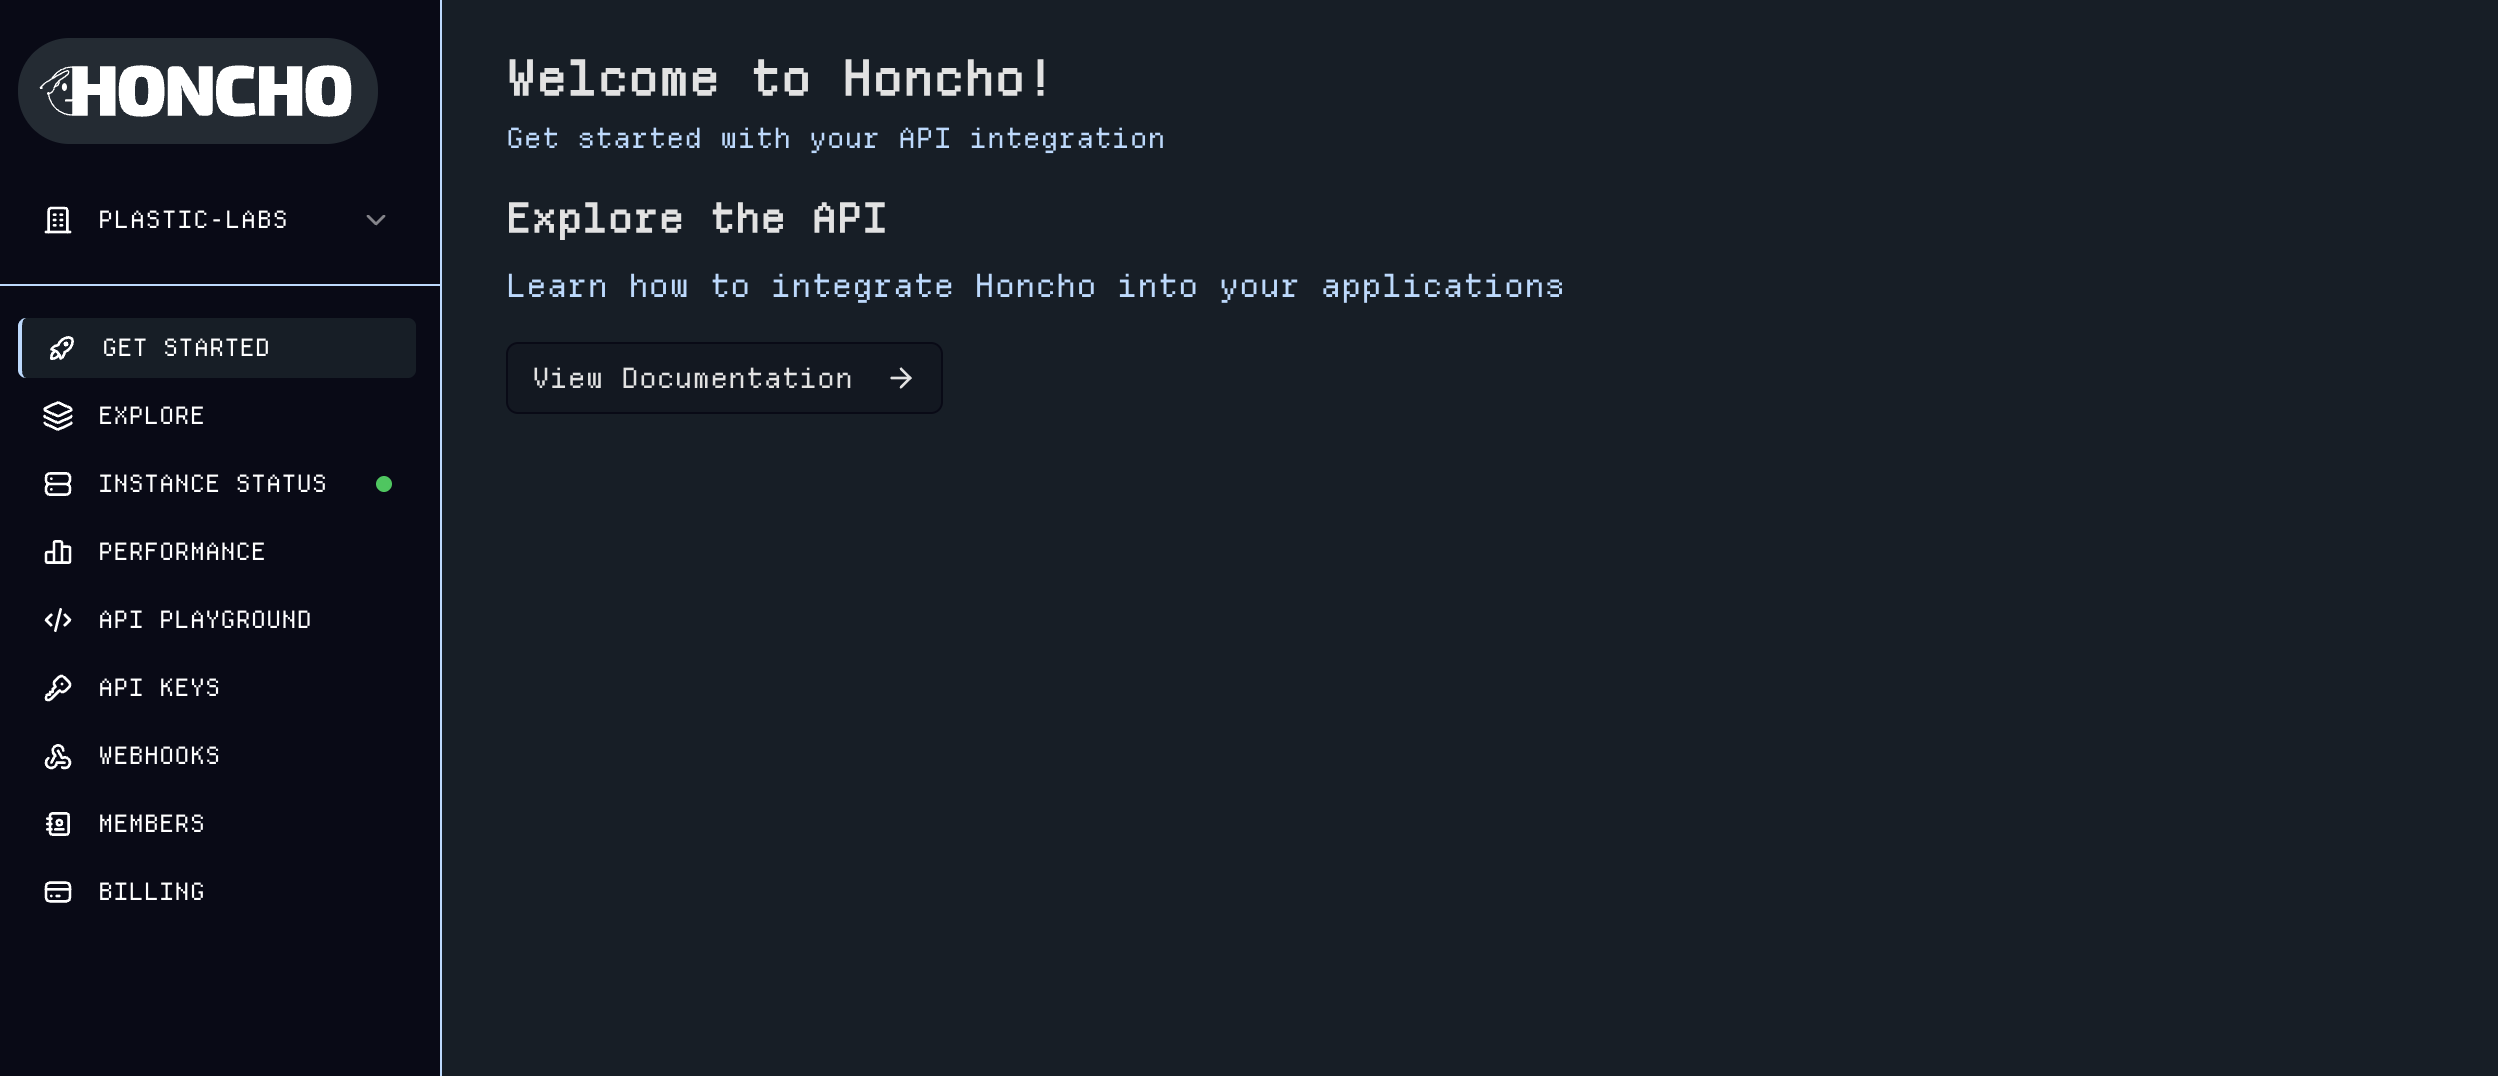
Once you've created an organization, you'll be taken to the dashboard and see
the Welcome page with integration guidance and links to documentation.
 Each organization has dedicated infrastructure running to isolate your
workloads. Once you add a valid payment method under the
[Billing](https://app.honcho.dev/billing) page, your instance will turn on.
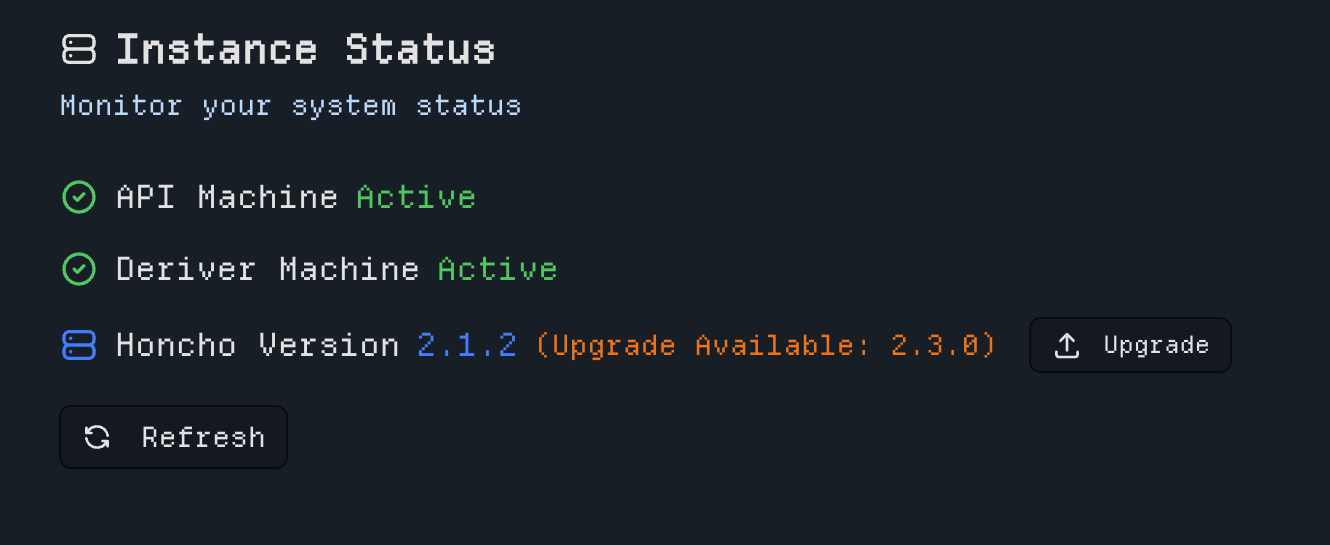
## 2. Activate your Honcho instance
Navigate to the [Billing](https://app.honcho.dev/billing) page to add a payment method. Your Honcho instance provisions automatically, and you can monitor the deployment on the [Instance Status](https://app.honcho.dev/status) page until all systems show a green check mark.
Each organization has dedicated infrastructure running to isolate your
workloads. Once you add a valid payment method under the
[Billing](https://app.honcho.dev/billing) page, your instance will turn on.
## 2. Activate your Honcho instance
Navigate to the [Billing](https://app.honcho.dev/billing) page to add a payment method. Your Honcho instance provisions automatically, and you can monitor the deployment on the [Instance Status](https://app.honcho.dev/status) page until all systems show a green check mark.
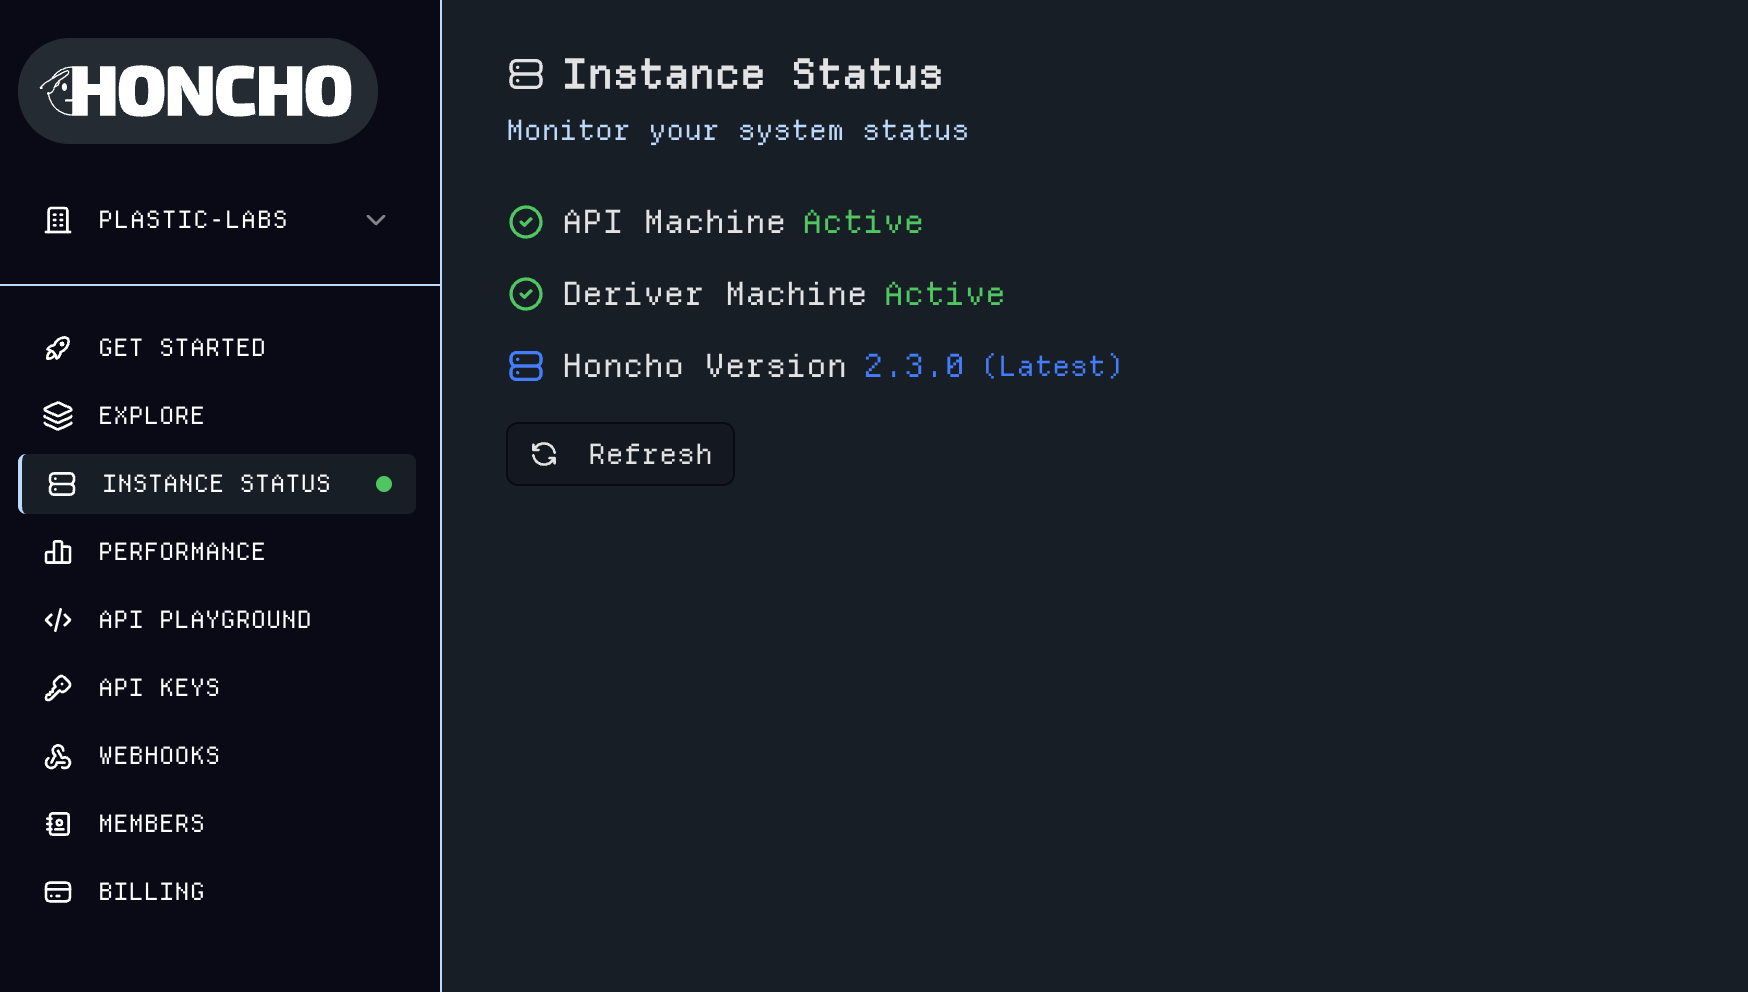 You can also upgrade Honcho when new versions are made available directly from the status page.
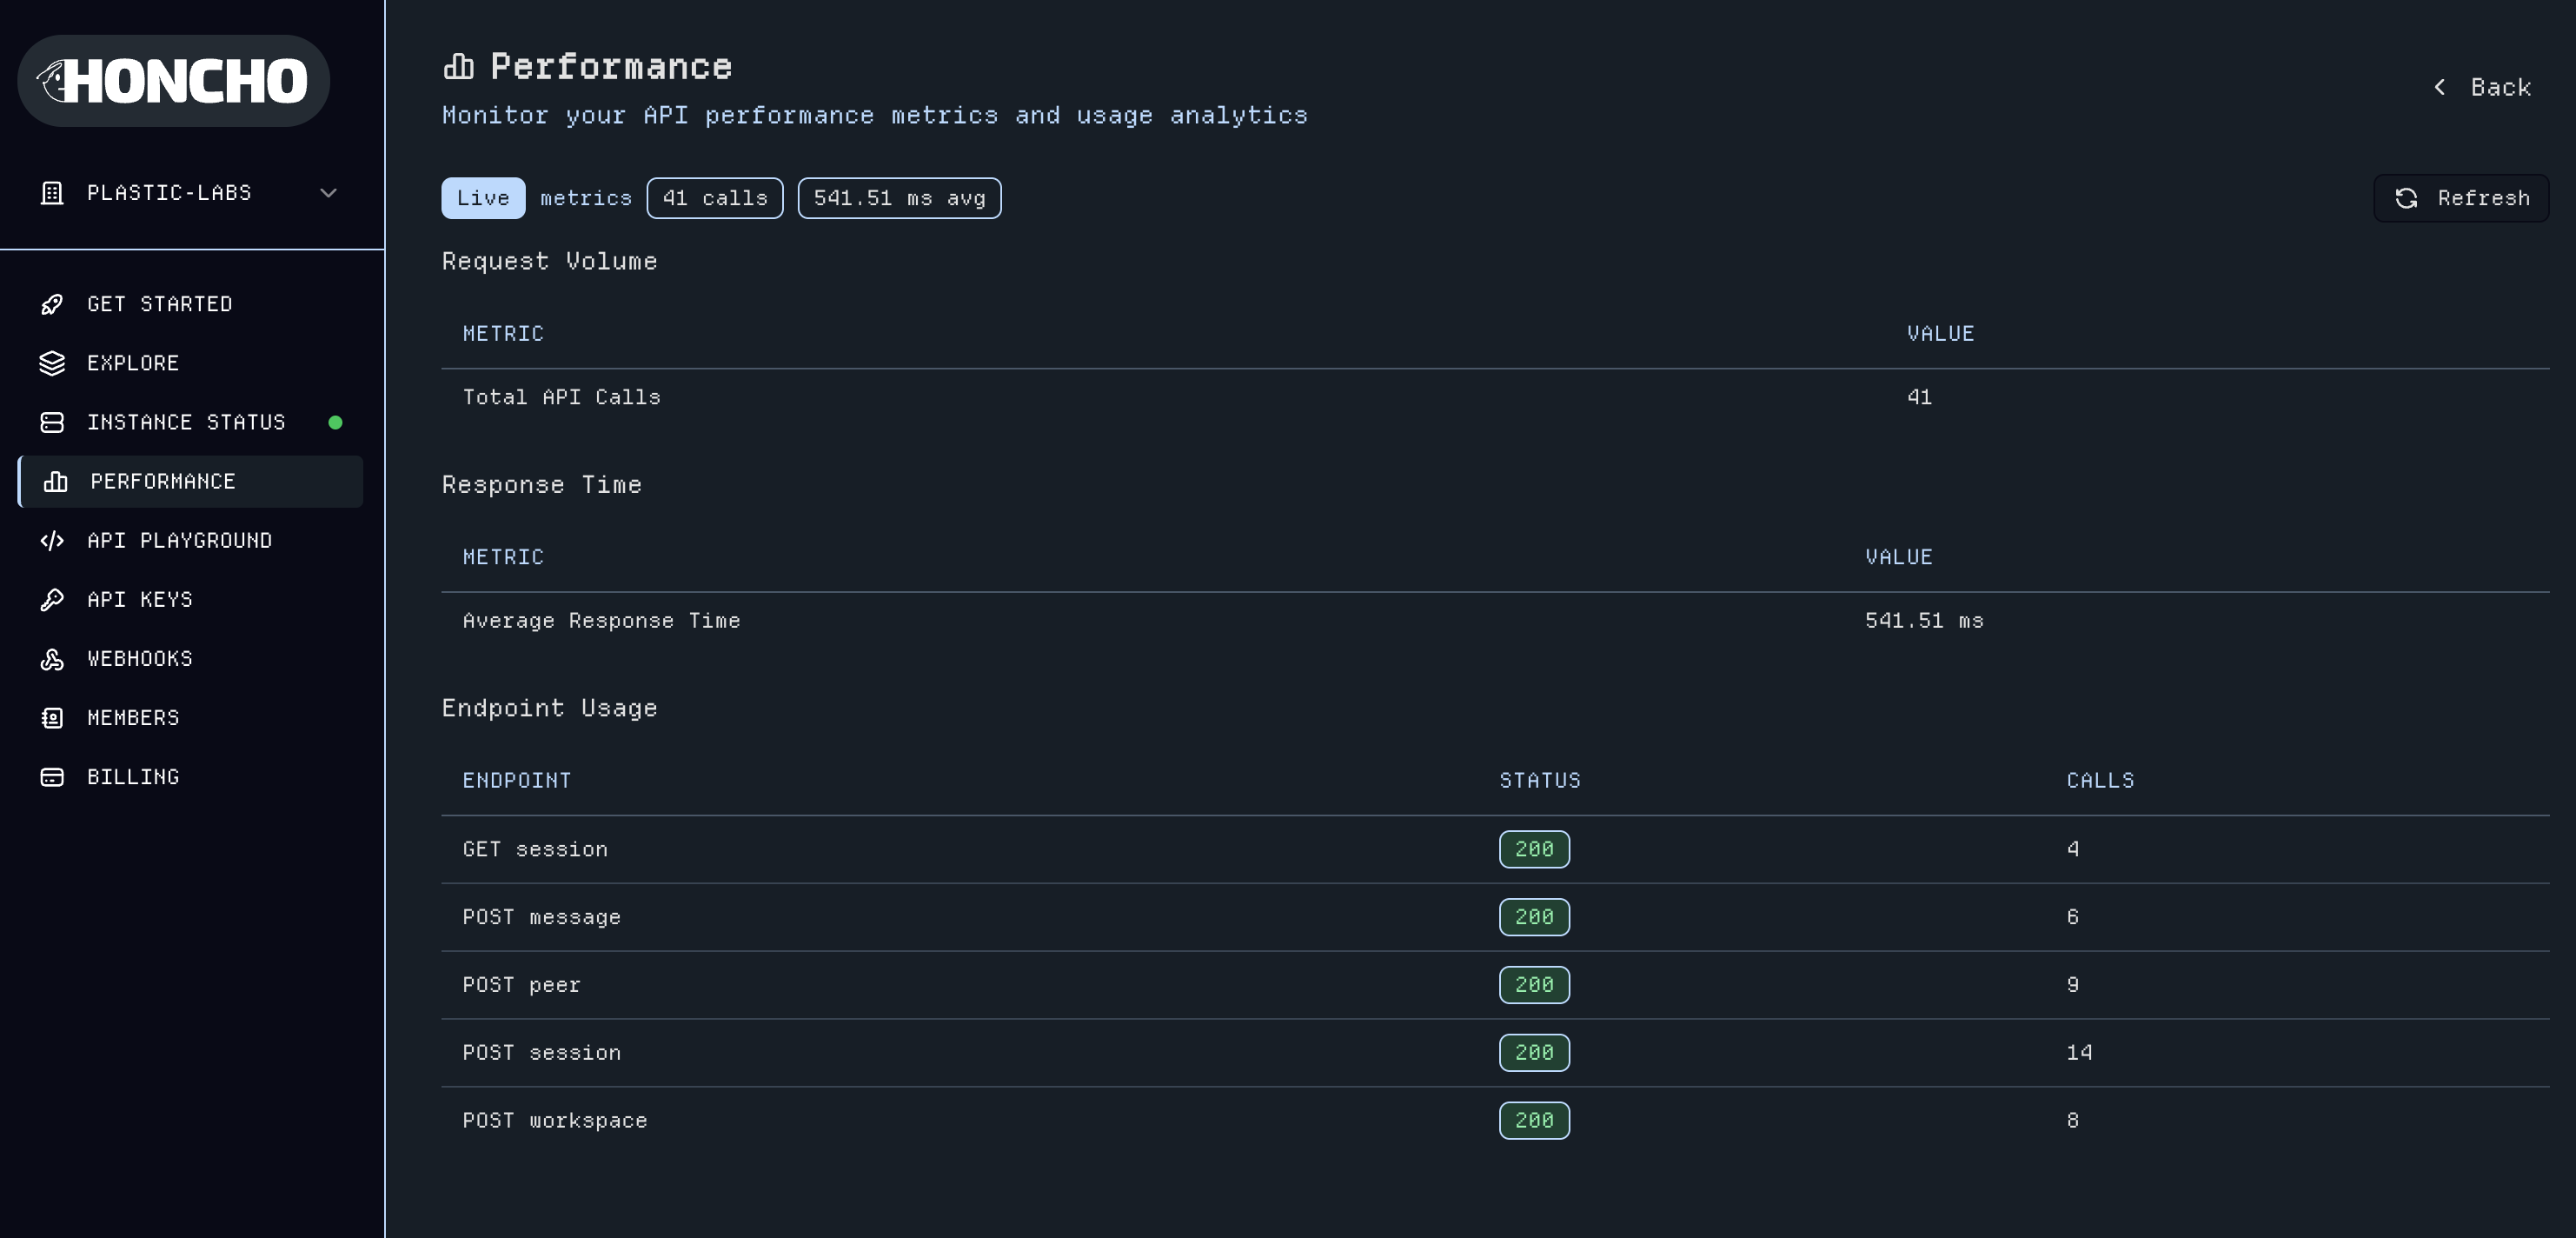
The **Performance** page provides comprehensive monitoring with usage metrics, health analytics, API response times, and endpoint usage across Honcho.
You can also upgrade Honcho when new versions are made available directly from the status page.
The **Performance** page provides comprehensive monitoring with usage metrics, health analytics, API response times, and endpoint usage across Honcho.
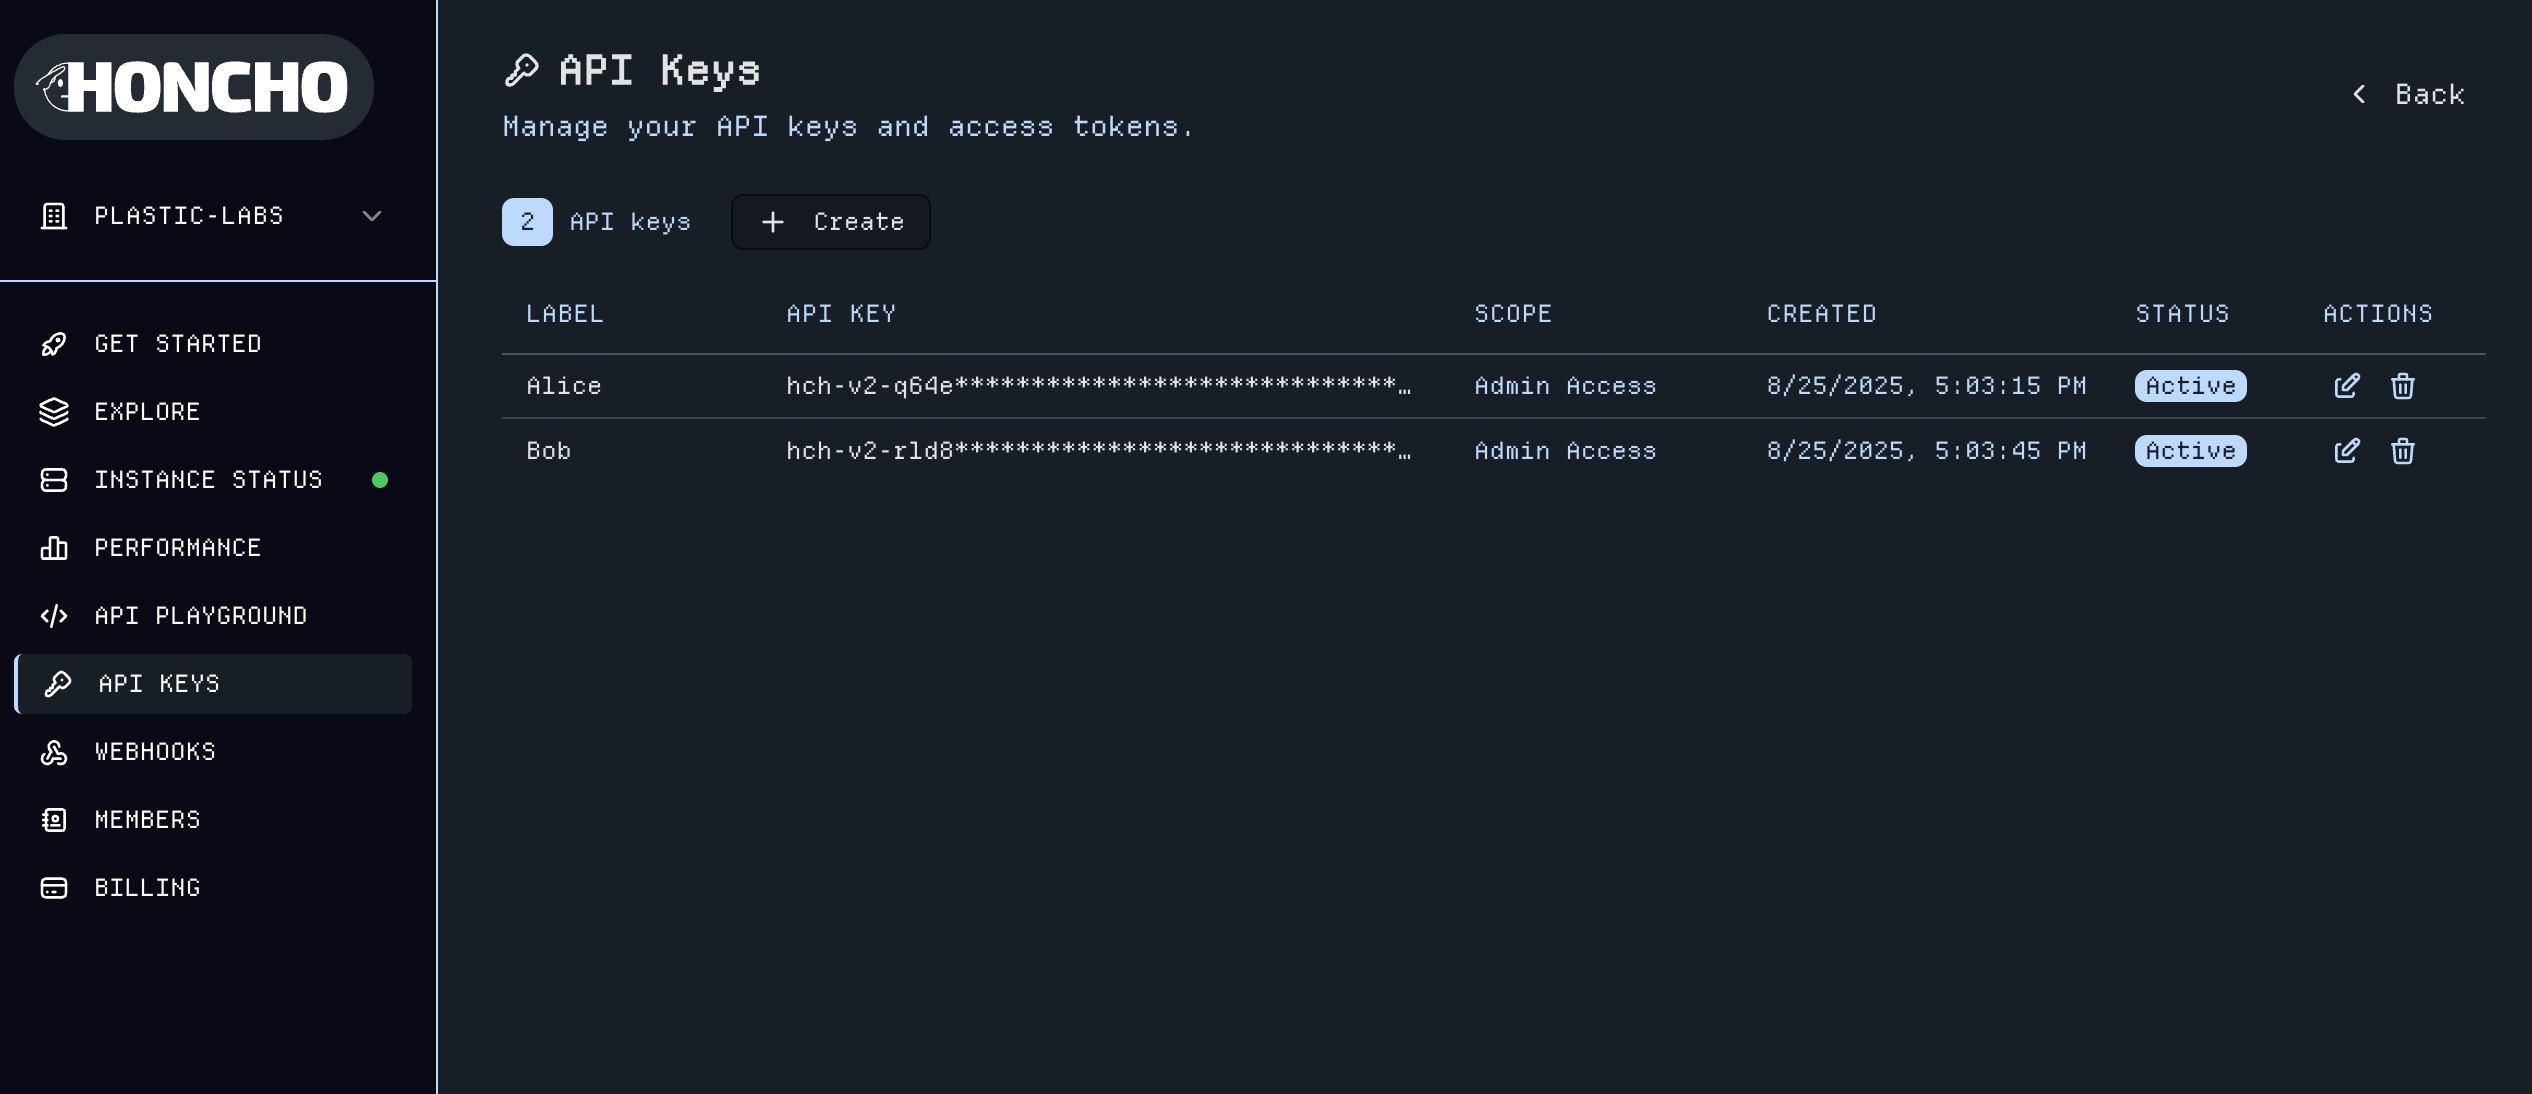
 ## 3. Manage API Keys
The [API Keys](https://app.honcho.dev/api-keys) page allows you to create and manage authentication tokens for different environments. You can create admin-level keys with full instance access or scope keys to a specific `Workspace`, `Peer`, or `Session`.
Scoped keys are authorized by their narrowest claim and never widen to the whole workspace:
* A **peer-scoped** key acts on its own peer, plus **read-only** access to the sessions its peer is an active member of (context, summaries, peers, its own per-session config, search, and message reads). It cannot write to those sessions or act on other peers.
* A **session-scoped** key is confined to its own session and cannot reach peer routes.
* Peer- and session-scoped keys **must carry their parent workspace** — creating one without a workspace is rejected.
## 3. Manage API Keys
The [API Keys](https://app.honcho.dev/api-keys) page allows you to create and manage authentication tokens for different environments. You can create admin-level keys with full instance access or scope keys to a specific `Workspace`, `Peer`, or `Session`.
Scoped keys are authorized by their narrowest claim and never widen to the whole workspace:
* A **peer-scoped** key acts on its own peer, plus **read-only** access to the sessions its peer is an active member of (context, summaries, peers, its own per-session config, search, and message reads). It cannot write to those sessions or act on other peers.
* A **session-scoped** key is confined to its own session and cannot reach peer routes.
* Peer- and session-scoped keys **must carry their parent workspace** — creating one without a workspace is rejected.
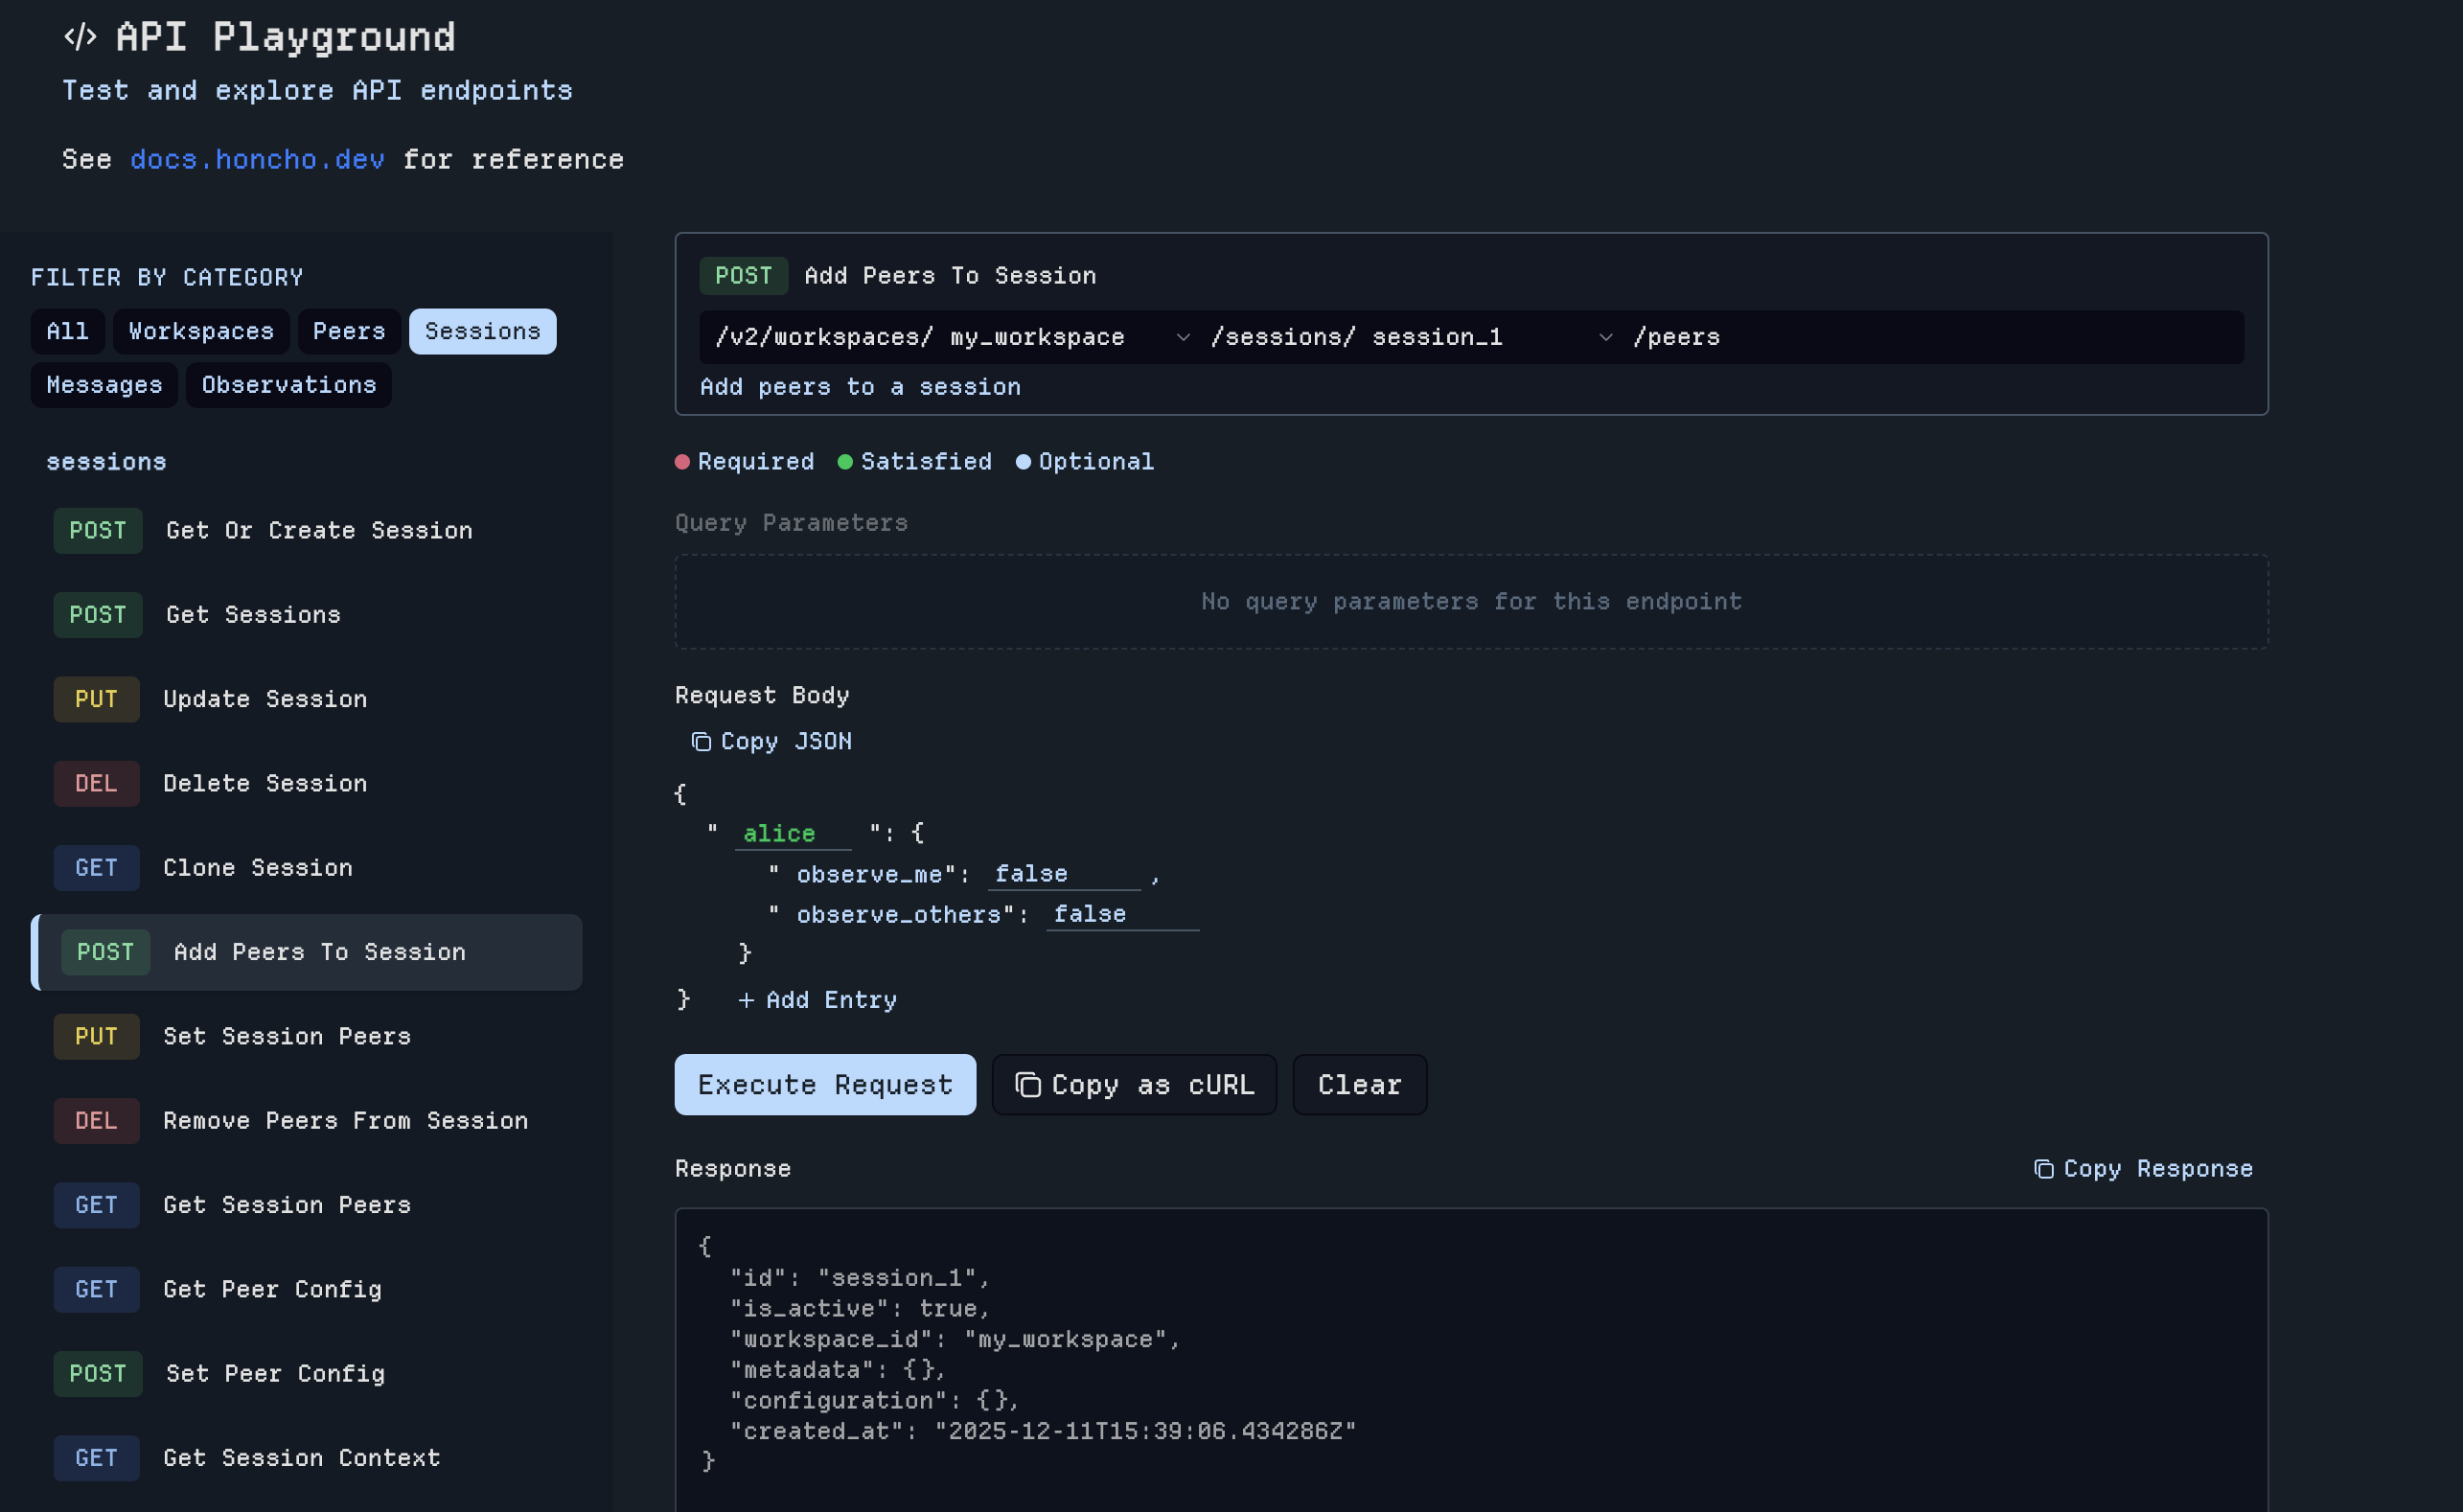
 ## 4. Test with API Playground
The [API Playground](https://app.honcho.dev/playground) provides a Postman-like interface to test queries, explore endpoints, and validate your integration. Authenticate with an API key and send requests directly to your Honcho instance with real-time responses and full request/response logging.
## 4. Test with API Playground
The [API Playground](https://app.honcho.dev/playground) provides a Postman-like interface to test queries, explore endpoints, and validate your integration. Authenticate with an API key and send requests directly to your Honcho instance with real-time responses and full request/response logging.
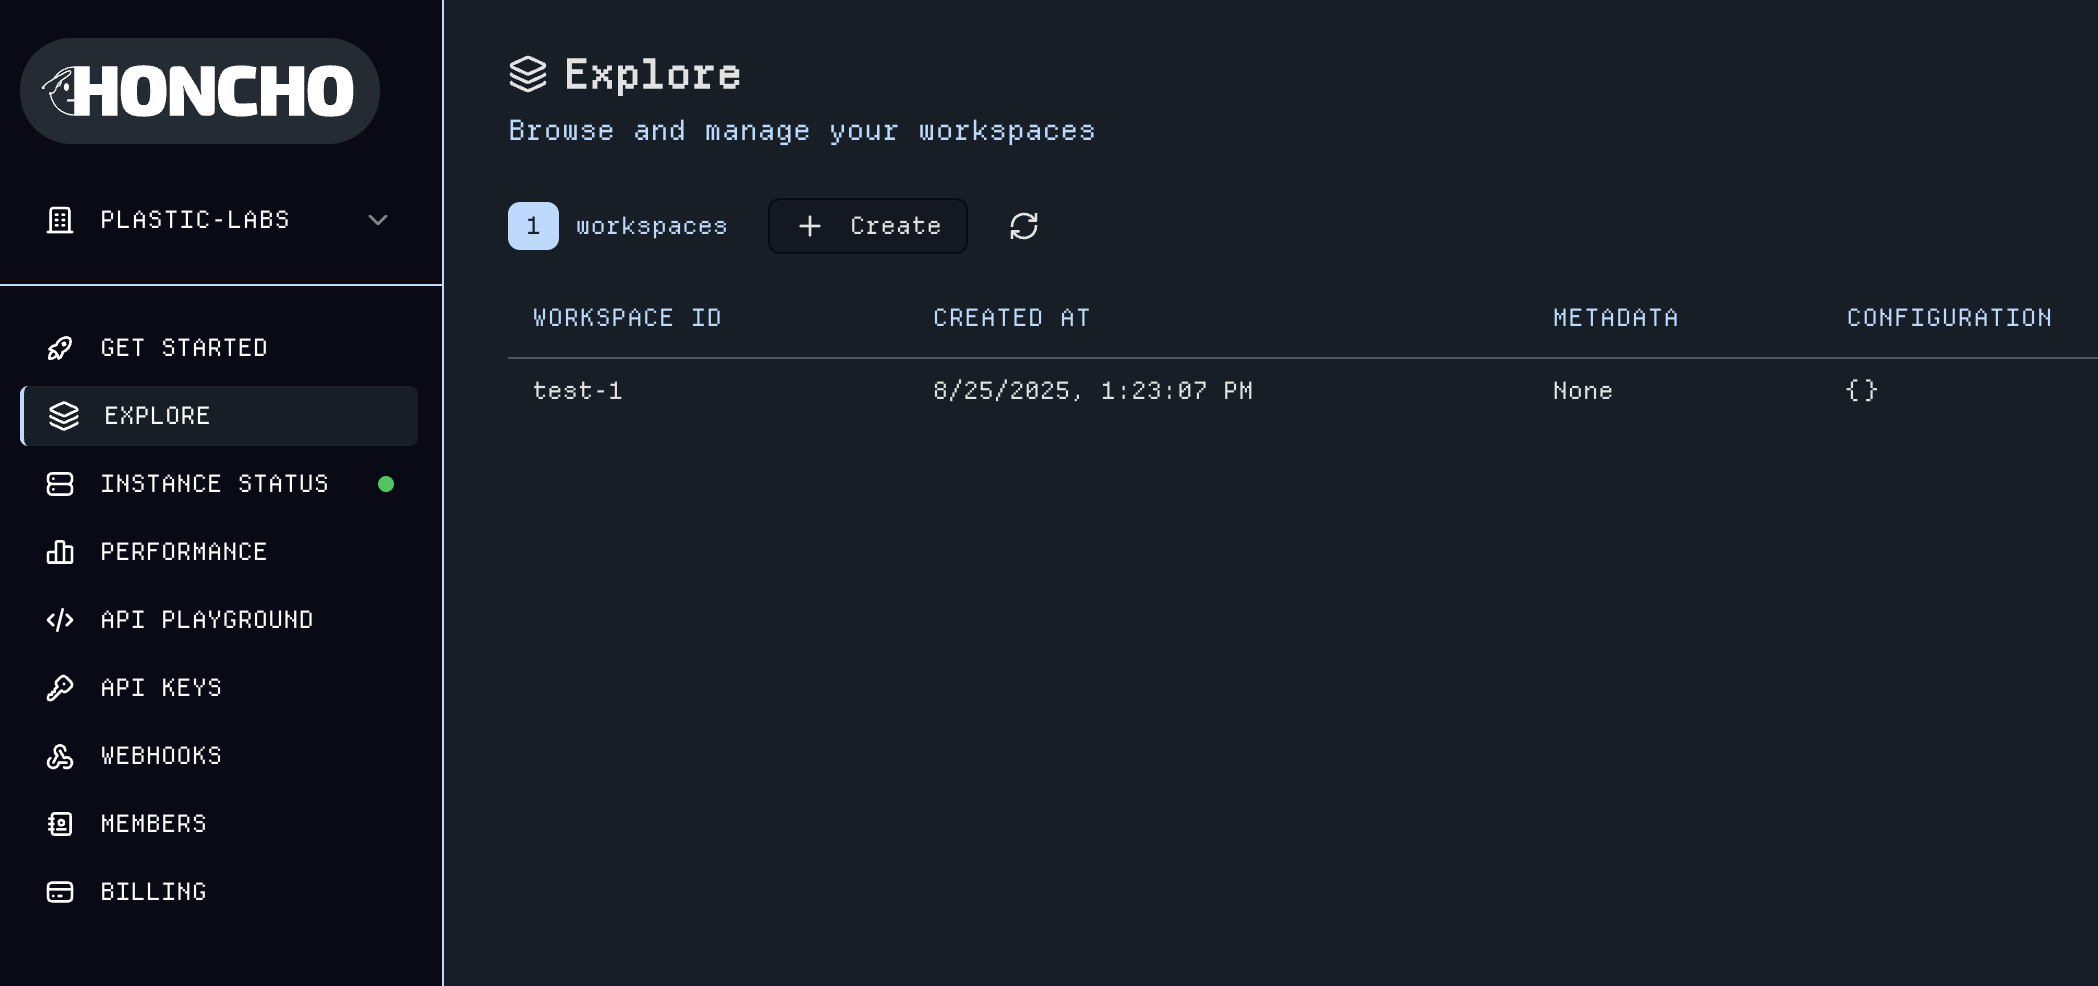
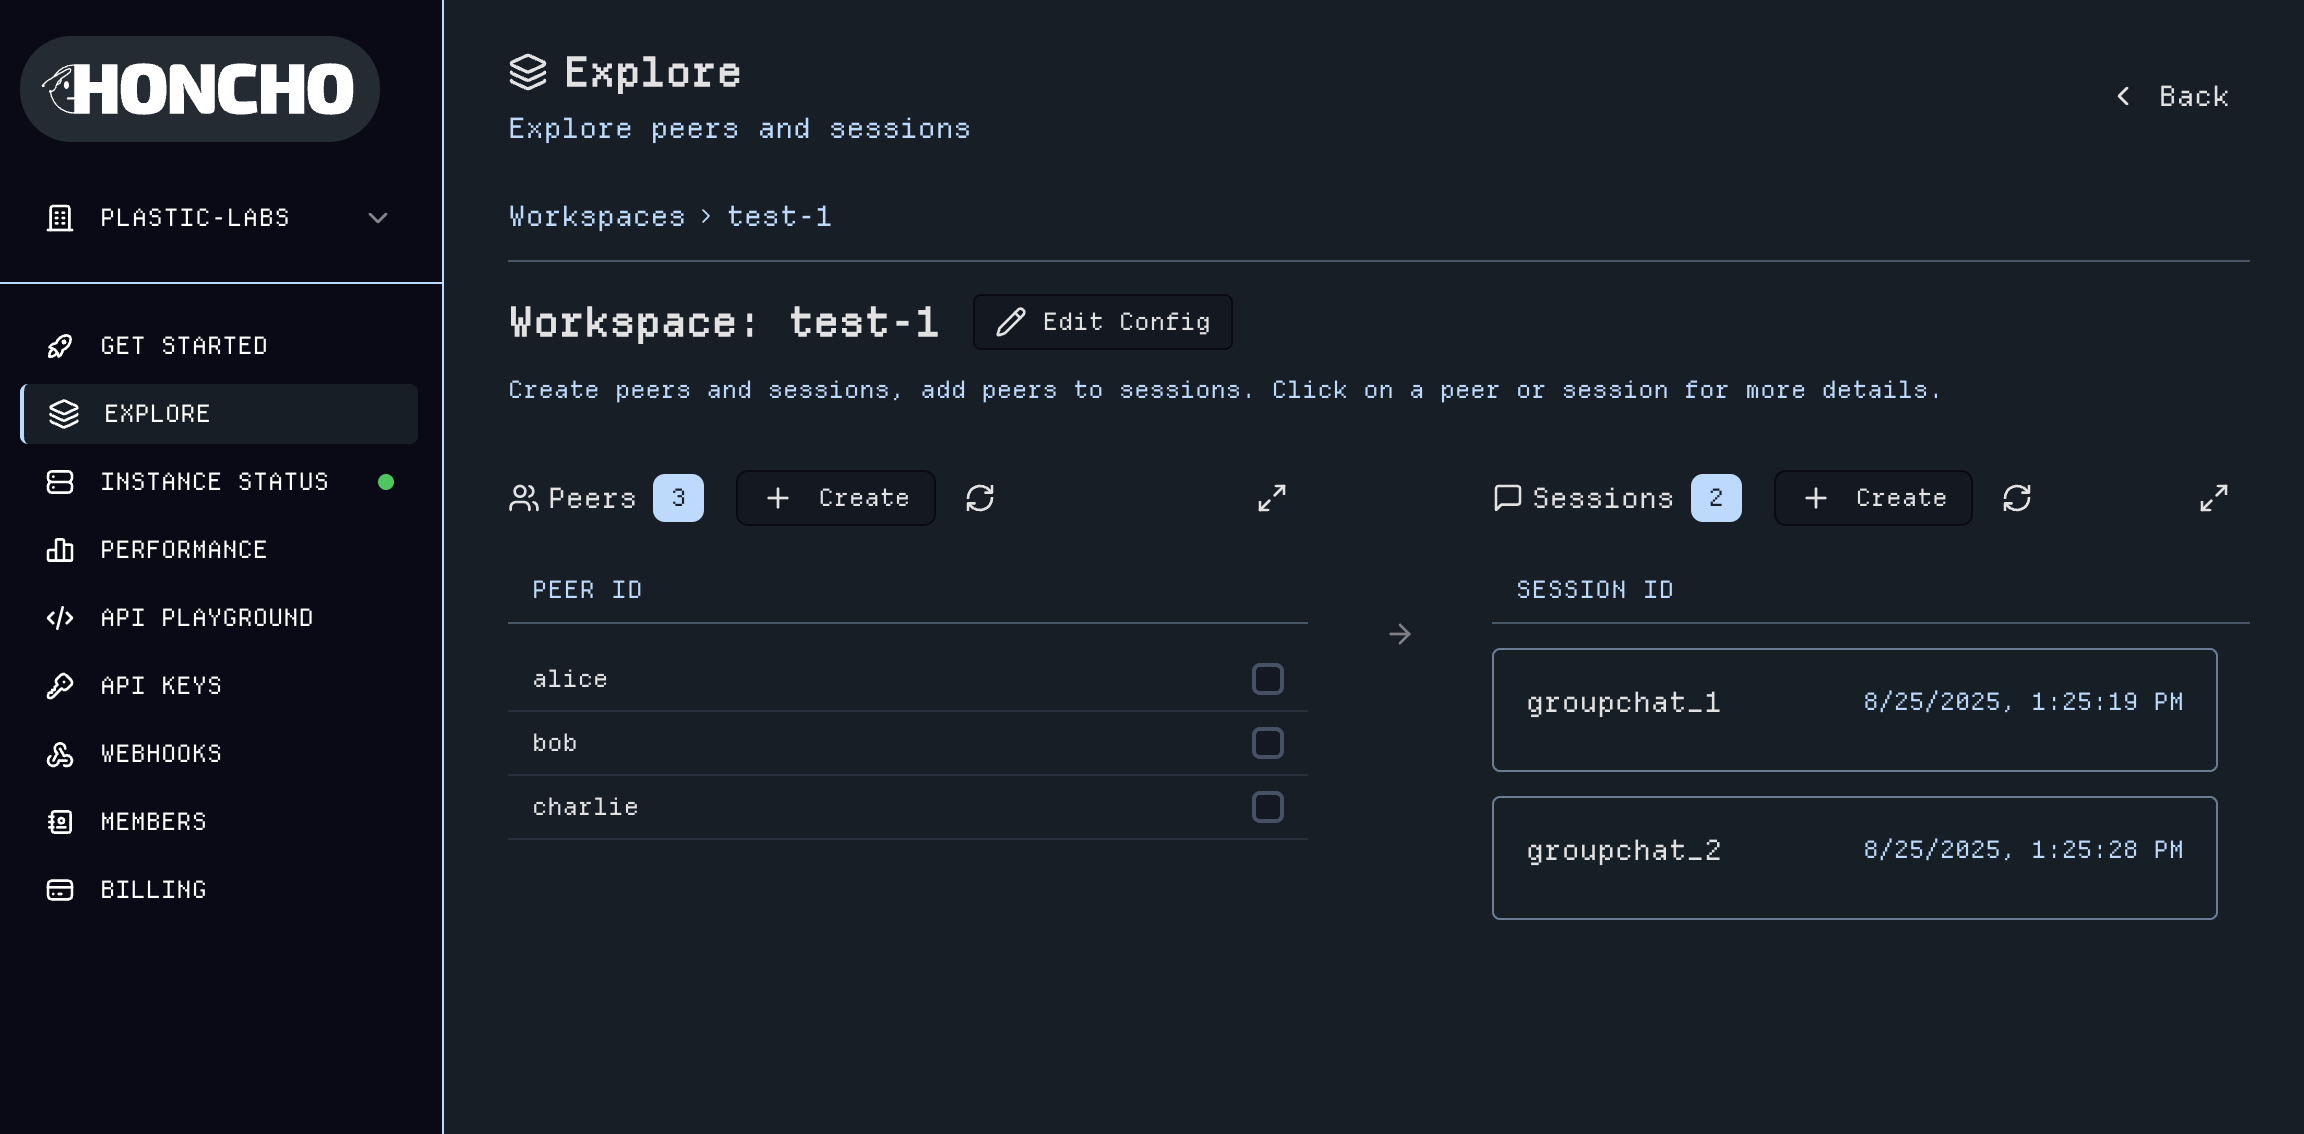
 ## 5. Workspaces
The [Explore](https://app.honcho.dev/explore) page provides comprehensive `Workspace` management where you can create workspaces and begin exploring the platform. Each `Workspace` serves as a container for organizing your Honcho data.
## 5. Workspaces
The [Explore](https://app.honcho.dev/explore) page provides comprehensive `Workspace` management where you can create workspaces and begin exploring the platform. Each `Workspace` serves as a container for organizing your Honcho data.
 Click into any workspace to access a general overview of `Peers` and `Sessions`. Here you can quickly create `Peers`, `Sessions`, and add multiple `Peers` to any `Session`. Edit the metadata and configuration for a `Workspace` with the Edit Config button. Click into any entity to navigate to their respective utilities pages or click the expand icon to view Workspace-wide `Peers` and `Sessions` data tables with more details.
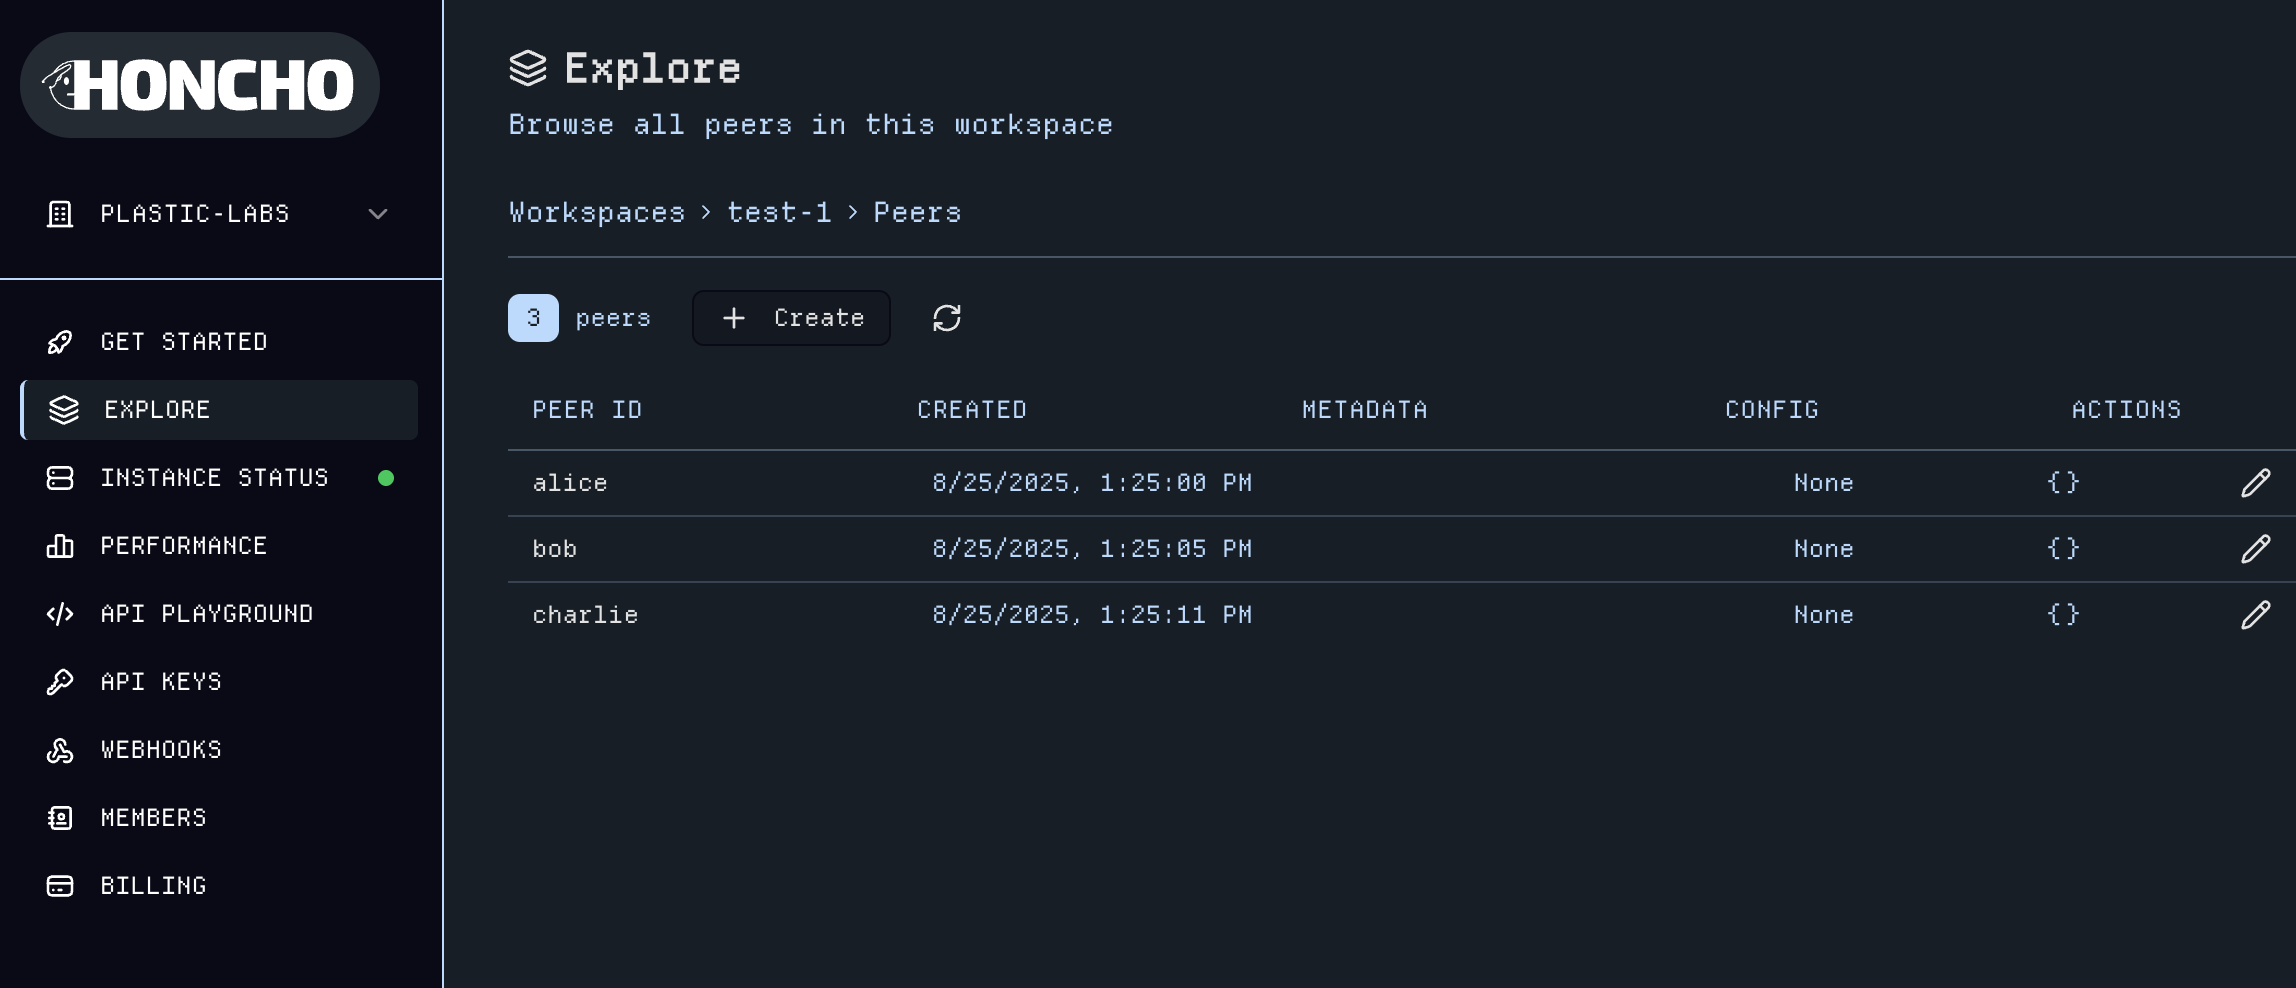
 ## 6. Peer Dashboard & Utilities
Expand the `Peers` list from the `Workspace` dashboard to see a detailed view of `Peers`.
## 6. Peer Dashboard & Utilities
Expand the `Peers` list from the `Workspace` dashboard to see a detailed view of `Peers`.
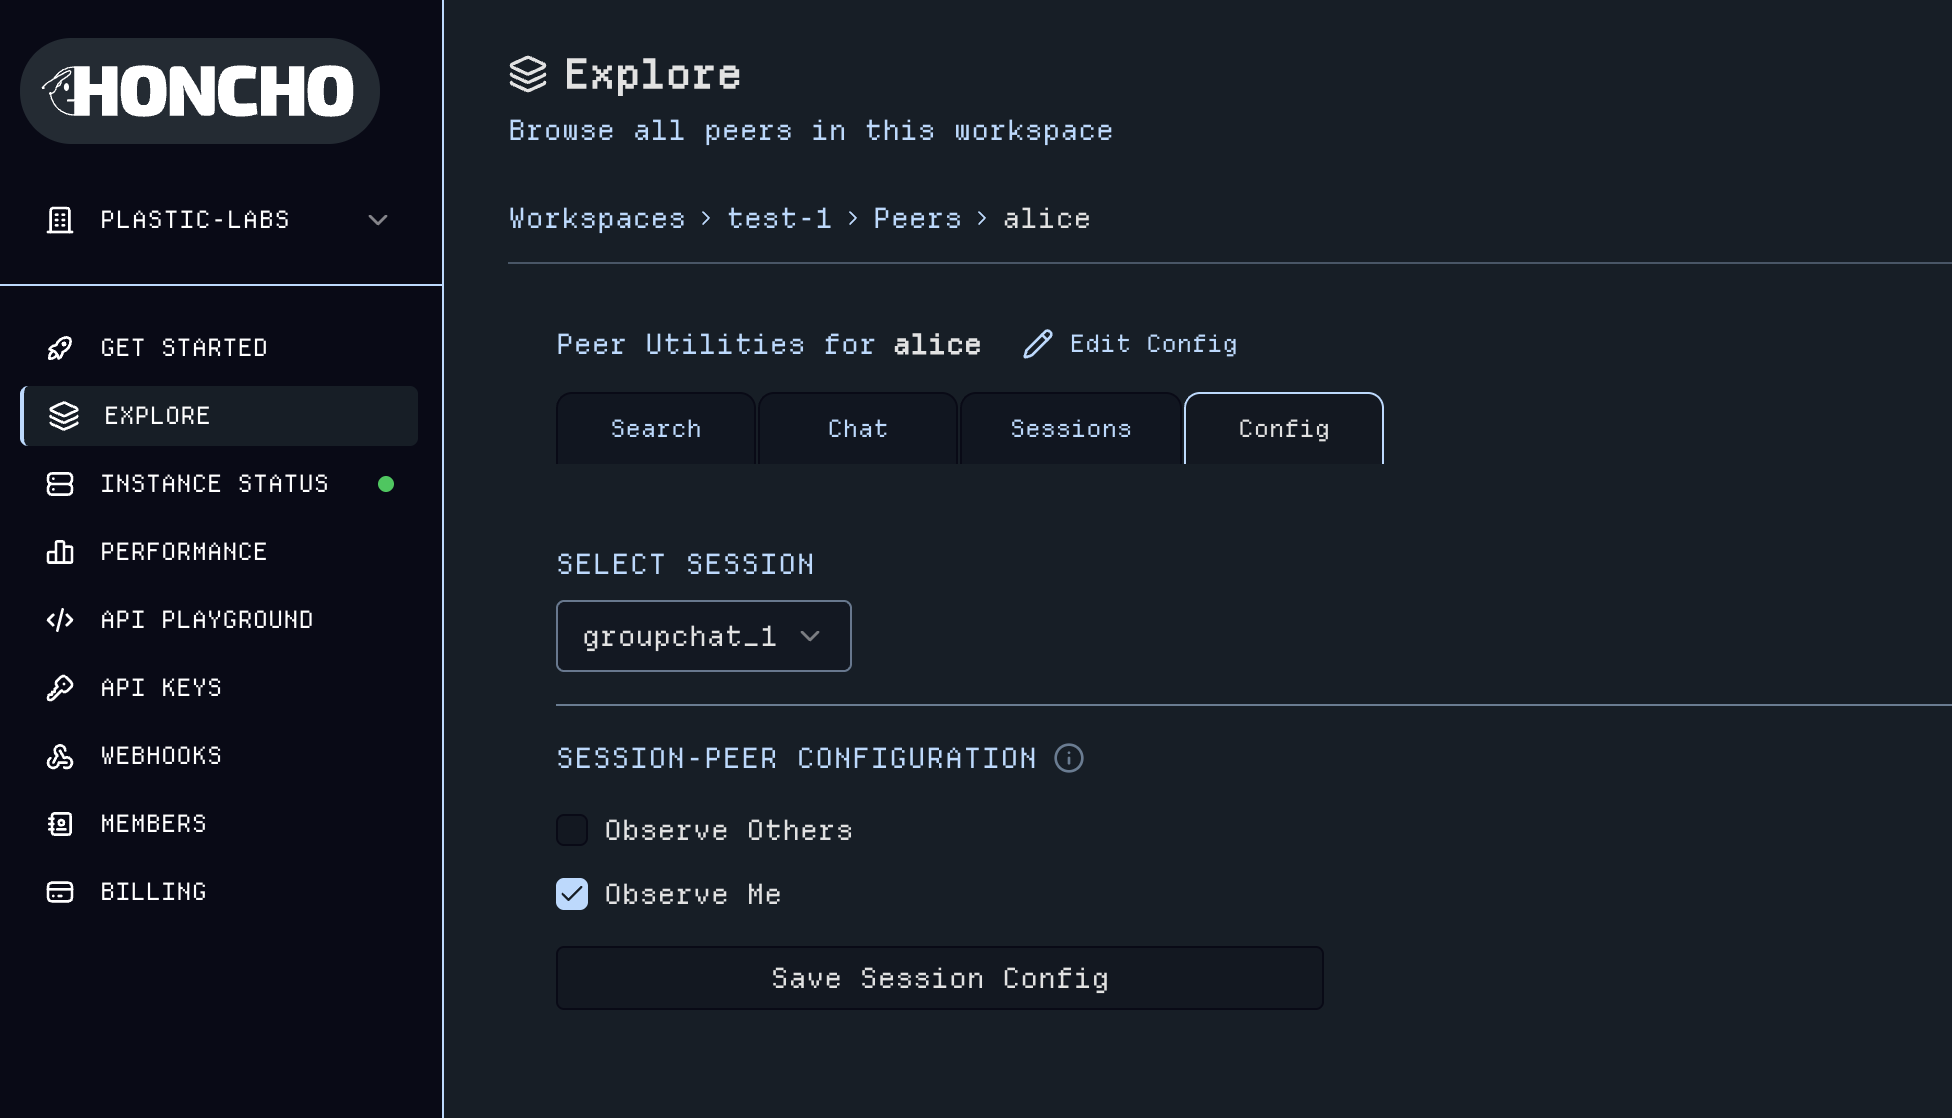
 Click into any peer to navigate to their respective utilities page. Next to the `Peer` name you can edit the [Peer Configuration](/docs/v3/documentation/features/advanced/reasoning-configuration), and in the tabs below, explore all utilities for the `Peer`.
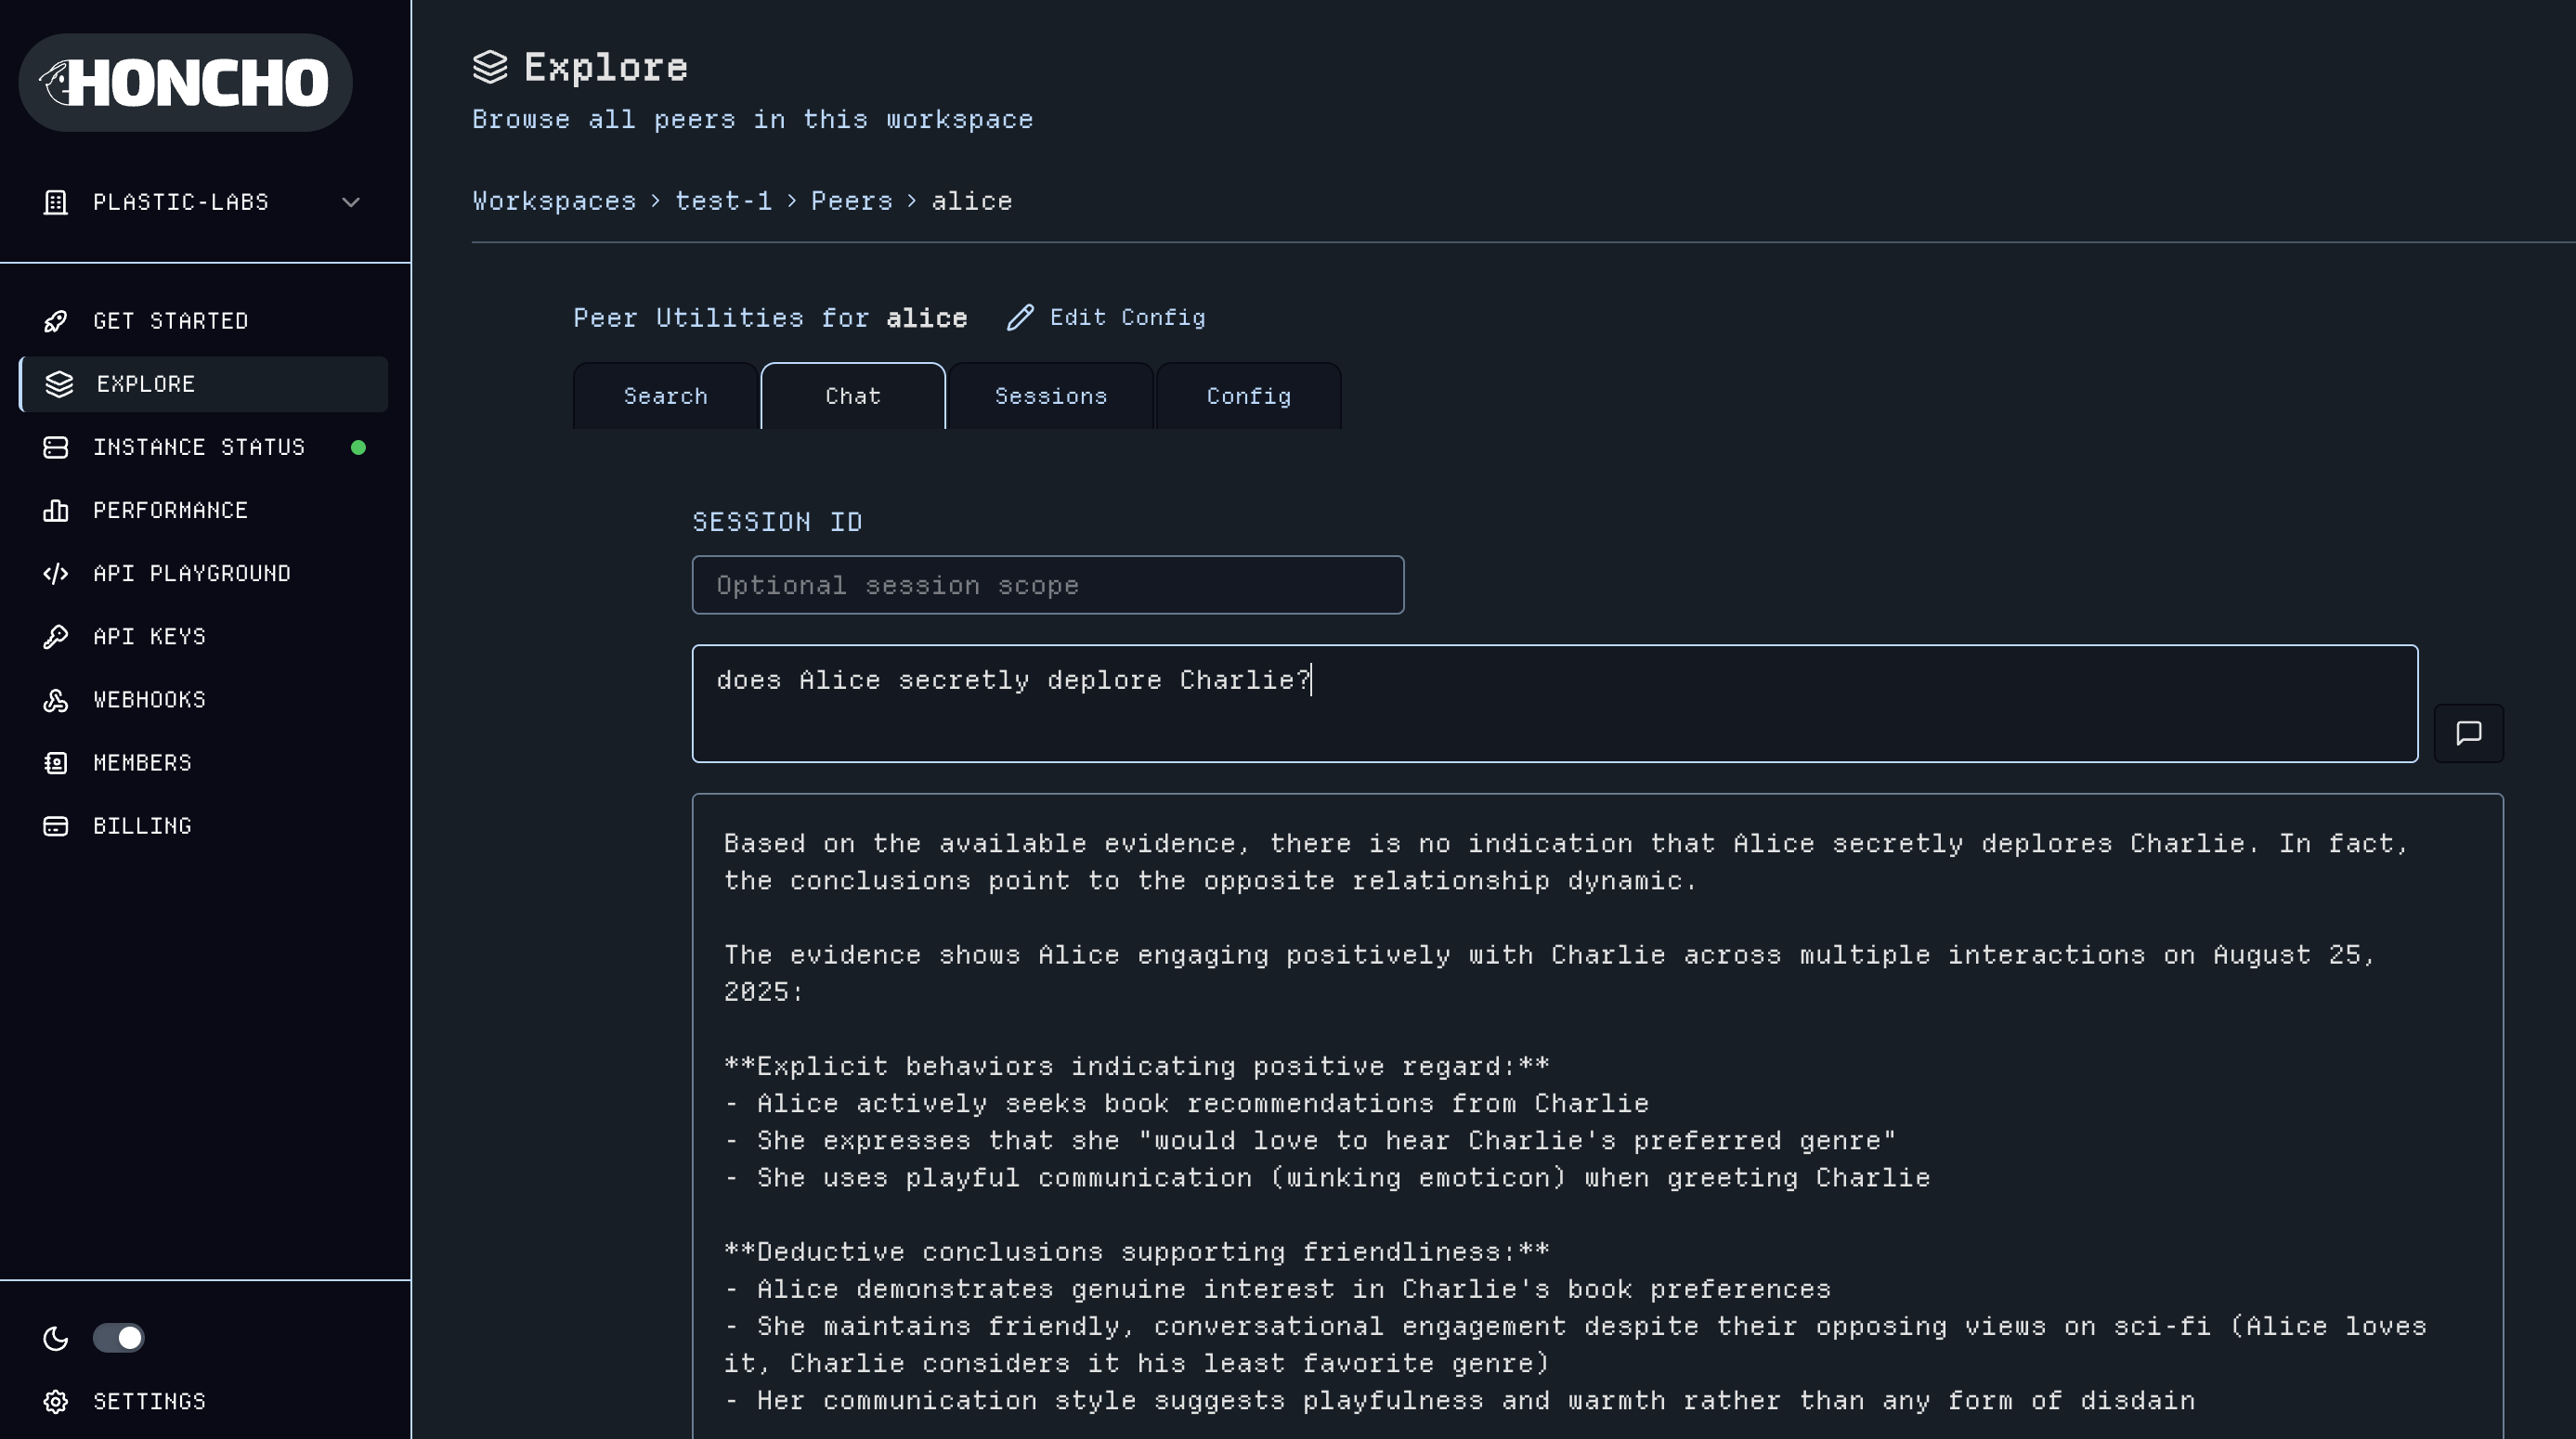
 Utilities include:
* **Message search** across all sessions for a `Peer`
* **Chat** to query `Peer` representations with an optional session scope (results vary based on the `Peer`'s configuration)
Utilities include:
* **Message search** across all sessions for a `Peer`
* **Chat** to query `Peer` representations with an optional session scope (results vary based on the `Peer`'s configuration)
 * **Session logs** view which `Sessions` the `Peer` is active
* **Peer configuration and metadata management** including [Session-Peer Configuration](/docs/v3/documentation/features/advanced/reasoning-configuration#session-configuration)
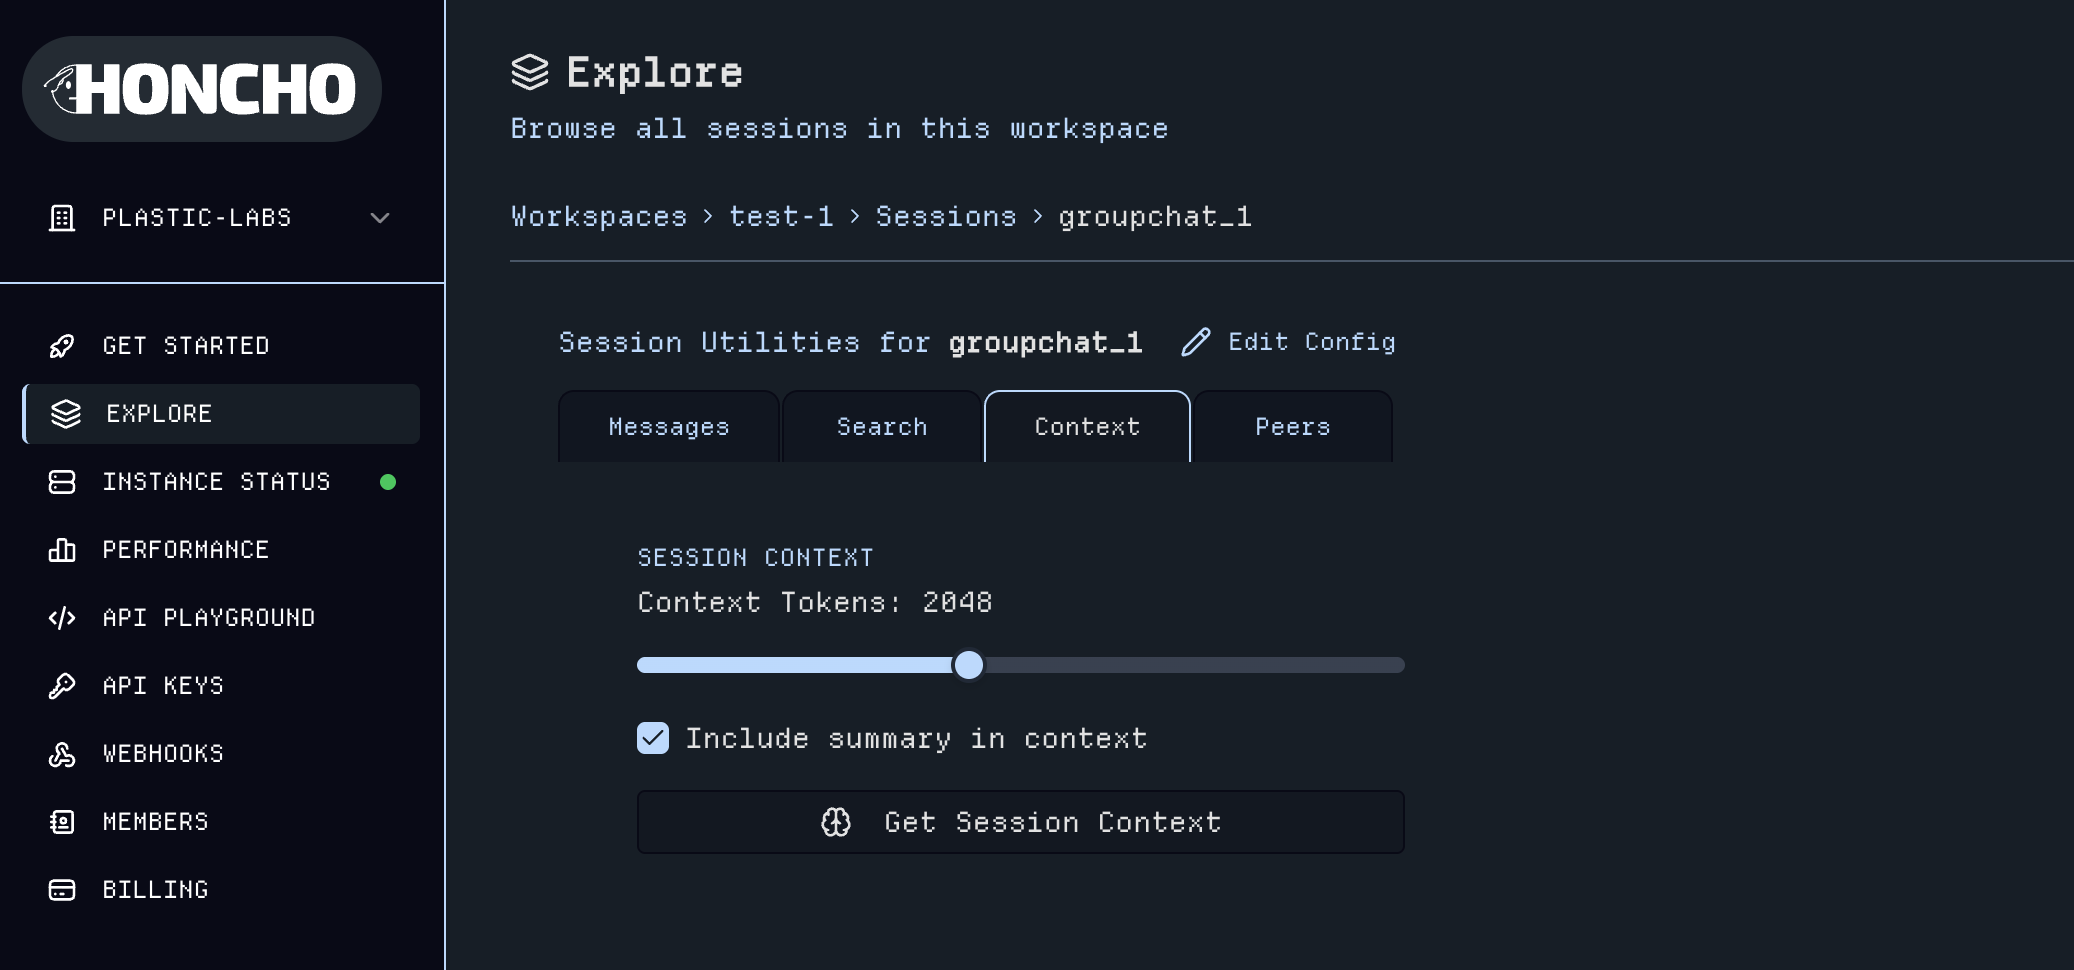
## 7. Session Dashboard & Utilities
Click into the sessions view within a workspace to see a table of all of your `Sessions` data.
* **Session logs** view which `Sessions` the `Peer` is active
* **Peer configuration and metadata management** including [Session-Peer Configuration](/docs/v3/documentation/features/advanced/reasoning-configuration#session-configuration)
## 7. Session Dashboard & Utilities
Click into the sessions view within a workspace to see a table of all of your `Sessions` data.
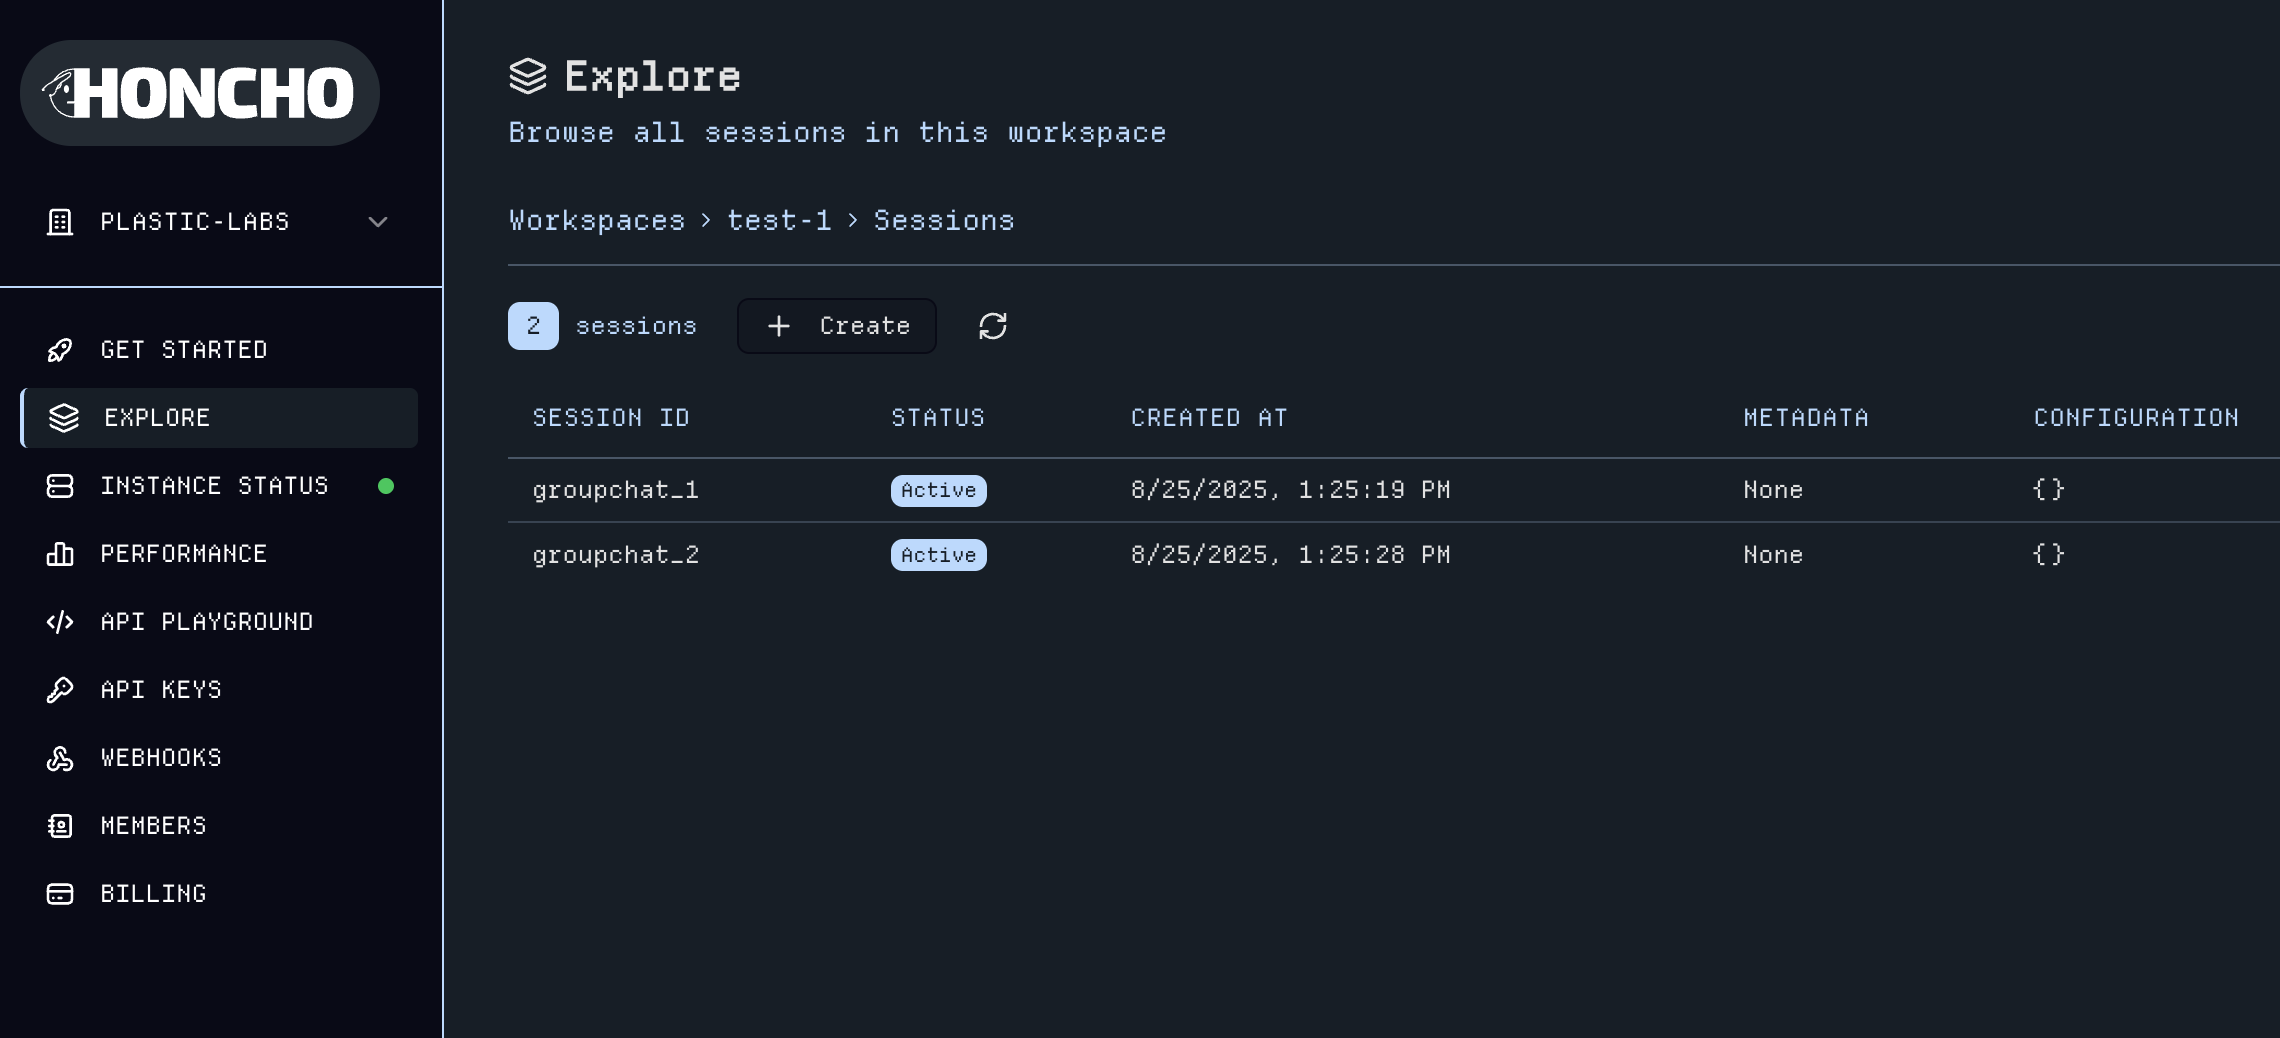 Click into a `Session` to open its utilities page.
 Here you can:
* **View and add Messages** within the `Session`; filter messages by `Peer`
* **Advanced search** across `Session` messages
* **Peer management** for adding/removing `Peers` and editing a `Peer`'s Session-level configuration
* **Get Context** to generate LLM-ready context with customizable token limits
Here you can:
* **View and add Messages** within the `Session`; filter messages by `Peer`
* **Advanced search** across `Session` messages
* **Peer management** for adding/removing `Peers` and editing a `Peer`'s Session-level configuration
* **Get Context** to generate LLM-ready context with customizable token limits
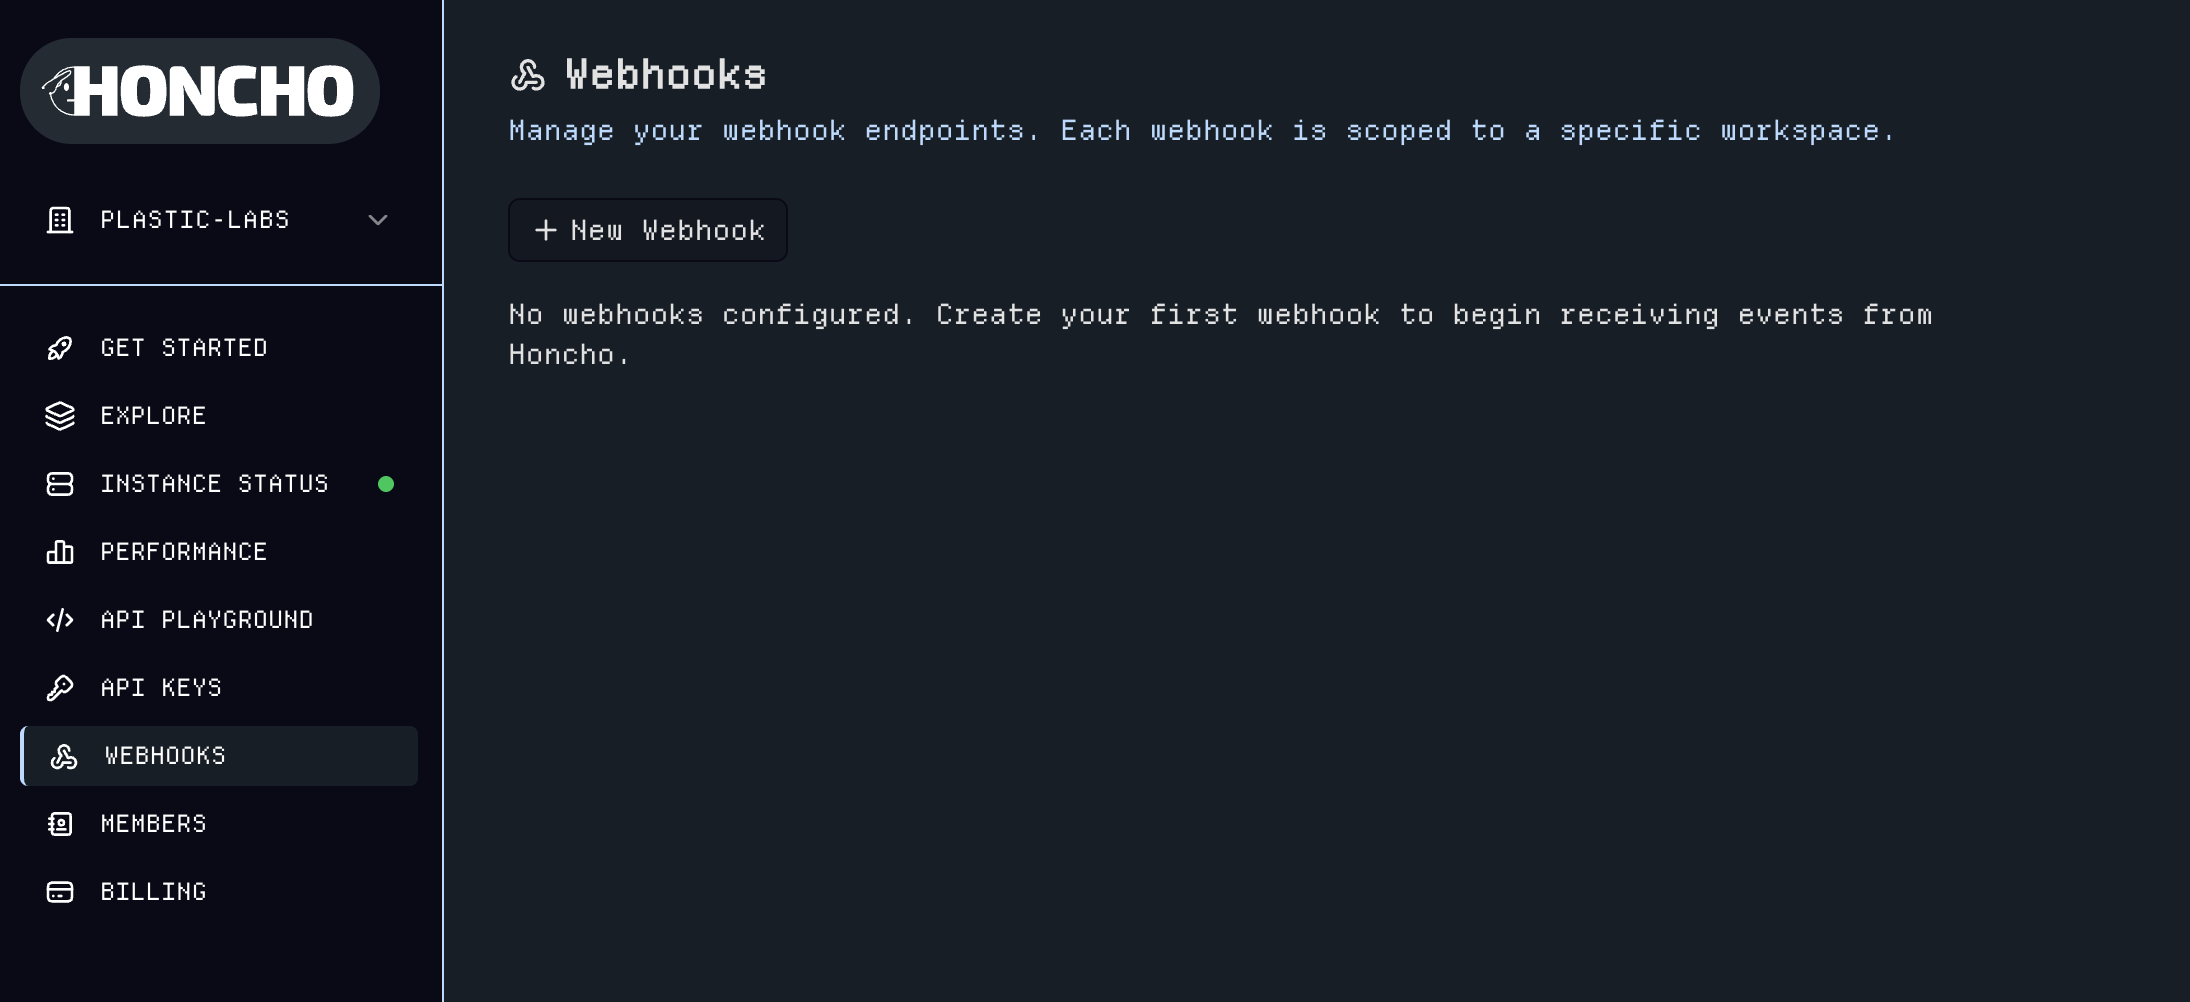
 ## 8. Webhooks Integration
The [Webhooks](https://app.honcho.dev/webhooks) page enables Webhook creation and management.
## 8. Webhooks Integration
The [Webhooks](https://app.honcho.dev/webhooks) page enables Webhook creation and management.
 ## 9. Organization Member Access
The [Members](https://app.honcho.dev/members) page provides organization administration to manage your team's access to Honcho with the ability to grant admin permissions.
## 9. Organization Member Access
The [Members](https://app.honcho.dev/members) page provides organization administration to manage your team's access to Honcho with the ability to grant admin permissions.
 ## Go Further
View the [Architecture](/docs/v3/documentation/core-concepts/architecture) to see how Honcho works under the hood.
Dive into our [API Reference](/docs/v3/api-reference) to explore all available endpoints.
## Next Steps
Get started with managed Honcho instances
Connect with 1000+ developers building with Honcho
View our guidelines and explore the codebase
See Honcho in action with real examples
## Go Further
View the [Architecture](/docs/v3/documentation/core-concepts/architecture) to see how Honcho works under the hood.
Dive into our [API Reference](/docs/v3/api-reference) to explore all available endpoints.
## Next Steps
Get started with managed Honcho instances
Connect with 1000+ developers building with Honcho
View our guidelines and explore the codebase
See Honcho in action with real examples